Today, Halloween has become a holiday for which costumes are specially sewn, hairstyles and makeup are selected. Everyone wants to look unusual and terribly beautiful. Children especially love to try on the images of ghouls and other evil spirits. It is important to remember that the makeup you want to do for Halloween for your children is different from makeup for adults: all components must be hypoallergenic and not harm the baby’s delicate skin.
Types of makeup
First of all, it is important to determine for yourself what material you will use. There are several types of paint for creating Halloween makeup:
- Face painting.
- Theater makeup.
- Face chalks.
The good thing about face painting is that it is easy to apply. Like watercolor paints, it is diluted with water, does not crumble over time, does not flow, and does not stain clothes. The main advantages of this makeup are its environmental friendliness and hypoallergenicity, which is important when doing makeup for children . It's not cheap, but one package is enough to celebrate Halloween several times.
Theater makeup is much heavier than the previous type of paint, and over time it can crack and stain the child’s clothes. In the light it shimmers with a greasy sheen.
One of the budget options for children's makeup is face crayons. These are non-toxic paints that are easy to apply with your fingers or a regular sponge. Disadvantage: They wear out quickly.
Materials
You will need pencils and eye shadow, eyeliner, mascara, concealer, blush, and powder. Depending on the paint base used to apply makeup, you will need makeup removers.
Tools
Brushes of various thicknesses and textures, cotton sponges, napkins and discs.
Blending Basics
The first step is to check the skin's reaction to the paint. To do this, a small layer of paint is applied to the child's wrist. If within an hour there are no allergic reactions in the form of a rash, dryness or irritation, then you can safely get to work. Before directly applying makeup, it is recommended to lubricate the child’s skin with baby cream.
Basic rules for applying proper makeup
To make beautiful makeup, it is not enough just to have a set of high-quality professional cosmetics; you need to know the basic rules for creating it and be able to apply them in practice. Neat make-up always looks impressive, attracting the attention of others. A girl who knows the technique of applying it can easily transform herself, emphasizing her advantages and evoking enthusiastic compliments. Despite the fact that makeup is predominantly a female art, not every woman masters it. And the presence of the most expensive and elite cosmetics does not guarantee an excellent result if you do not master the rules of its use. Knowing how to apply makeup correctly, you can look impressive and attractive in any situation, even without having an arsenal of tubes, jars and palettes.
Makeup can be of two types - simple and complex. The first is necessary to give freshness to a woman’s face; with the help of the second, skin imperfections (moles, scars) are carefully shaded. Depending on the time of day and function, makeup can be daytime (close to natural) and evening, that is, intended for a formal appearance.
Everyday makeup refers to a simple look. It is designed to disguise minor imperfections, give the face freshness and highlight its natural beauty. If the skin does not have very noticeable defects, and the facial features are harmonious, proper daytime makeup will only enhance the natural charm of a woman, while being invisible. Evening makeup is usually complicated and requires more time and cosmetics. It allows the use of decorative elements, glitter, false eyelashes and other paraphernalia.
Regardless of the type of makeup you choose, you will have to go through the same stages of applying it: toning and powdering the skin, lining the eyebrows, eyes, applying blush and covering the lips with lipstick or gloss.
Preparing for the makeup process
Preparation is no less important than the process of applying cosmetics. Makeup should only be applied correctly to clean skin. Therefore, first you need to remove the remnants of makeup, wash your face, and wipe your face with toner. Next, we determine your skin type. It is important to moisturize dry skin with day cream. For oily or combination skin, apply a mattifying agent or base.
The durability and accuracy of the makeup, as well as the time spent on its creation, largely depend on this stage. It is important to pay attention to every detail, try new techniques and select a harmonious combination of shades and textures. Practical skills will be developed over time, and then the question of how to apply makeup correctly will no longer arise. On a cleansed and moisturized face, makeup adheres better and lasts longer. It is not allowed to apply new layers to existing “plaster”. Makeup removal is definitely necessary. In general, the more the skin rests from cosmetics, the better its appearance and condition. If you have free time or on weekends, you can practice using homemade face masks or from store-bought ones. The frequency of such procedures is 1-2 times a week.
Washing with water is not enough for adult skin; it needs to be supplemented with cosmetic cream, milk or gel. Cleansing ends with tonic or lotion. Care is selected depending on skin type and time of year. The care product can be a fluid cream, a nourishing or moisturizing cream, or an emulsion.
How to apply foundation and foundation
Correction of problem areas and minor defects is carried out using a corrector and concealer. They can “hide” dark circles under the eyes, pimples, protruding veins, and pigmentation. To consolidate the camouflage effect, you should apply foundation and powder, which also provide an even complexion.
To select the color of the foundation, it is tested: applied to the inside of the brush.
For oily or combination skin, you can use products with a mattifying effect that will absorb excess sebum and eliminate shine.
- Let's apply the base. Before applying foundation, you need to prepare your skin. For this you will need a special makeup base. Girls with oily or combination skin should opt for a product with a mattifying effect; for normal or dry skin, a nourishing, moisturizing base is suitable. Such products effectively even out the complexion, refreshing it. After applying the base, hide the circles and puffiness under the eyes using a concealer. This should be done with the pads of your fingers and soft patting movements.
- Apply foundation. It should be used to cover the sharp edges of the face in order to smooth them out, making the face “softer” and more delicate. Walk along the line of the cheekbones, bridge of the nose, forehead, cheeks.
- Apply foundation. Do not apply too thick a layer of tone on your face, because even the highest quality and expensive cosmetics in excess can give your face an unnatural look. Squeeze a little cream onto the inside of your palm and begin to carefully apply it with a brush, moving from the edges of the face to its center. Carefully blend the product over the entire skin. Lightly powder the foundation layer with a soft brush - this will give your face a natural look.
When creating makeup, it is important to choose the right color of foundation and foundation. Too light shades will make the face look like a doll, lifeless. Dark ones are capable of creating an unnatural contrast with the neck and other naked parts of the body. When choosing a tone, apply it to the inside of the hand - the product should completely match the color of this area of the hand. To correct your face shape, you need to use two shades of foundation - your natural one and a darker one. The first is applied to the entire face in an even thin layer. The second is applied zonally, depending on the type of face.
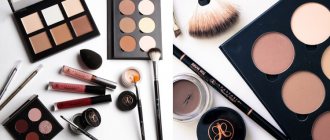
Tools and cosmetics
Determining the color type of appearance, namely the shade of skin, eyes and hair, is the next step on the path to flawless makeup. A correctly selected palette of eye shadow, blush and lipstick can embellish or completely transform a woman’s face. You can determine the range experimentally, relying on the recommendations of professional makeup artists and your artistic taste. It is clear that for daytime makeup you should choose nude and pastel shades that will not clearly stand out on the face. For an evening look, bright, rich colors, enchanting combinations, and interesting textures are suitable.
In any case, it is better to prepare the necessary cosmetics and tools in advance so that you can apply everything at once and not be distracted by searching while creating makeup. It is important to pay attention to the expiration date of cosmetics and decorative products and not to forget about their storage time after opening the package.
A set of sponges and brushes of different shapes and sizes will help in the difficult but interesting process of creating “make-up”. Cotton pads and swabs will correct errors and remove excess makeup. And of course, at a comfortable table with good lighting and a large (preferably magnifying) mirror it will be easier to apply makeup.
Some tips:
- For those with a square face shape, it is recommended to apply a light shade to the middle of the forehead, the tip of the chin and the area under the eyes. Use a dark product to treat the area near the hairline, at the corners of the jaw and temples. The boundaries between transitions should be carefully shaded.
- A round face should be covered with a light foundation, and with the help of a dark foundation, visually narrow it, darkening the area of the cheeks and temples.
- Girls with a triangular face type need to apply a light tone on the forehead, chin and under the eyes - this way you focus attention on the center of the face. Cover the line of the cheeks and forehead with a dark tone.
- If you have an elongated face, it is necessary to darken the lower part of the chin - this will visually shorten your face. Do not skimp on blush for the cheeks, because such an accent also helps to draw attention to the middle of the face.
- On a pear-shaped face (narrow at the top, full at the bottom), a light tone should highlight the forehead area, the area under the eyes and the tip of the chin. A dark tone is applied to the cheeks and jaws - this visually makes them narrower.
Step-by-step makeup creation
It is important to follow the generally accepted sequence for applying makeup among makeup artists. In makeup, especially evening makeup, it is recommended to focus on one part of the face. As a rule, these are the eyes. They provide unlimited scope for the use of unexpected shades of shadows, their interesting combination with the natural color of the iris. A flutter of luxurious eyelashes, a bewitching gaze - these epithets are not in vain used when describing attractive women.
If you want to highlight seductive lips on your face, this is easy to do with bright lipstick. In this case, it is correct to make eye makeup natural and inconspicuous. Focusing on two or more parts of the face will make the image look doll-like or too “womanish.” Confidence and neatness are the hallmarks of a stylish and luxurious woman.
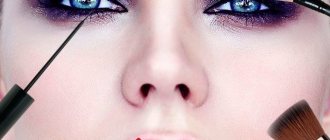
Eye makeup is the most important and difficult stage.
How to properly apply eye makeup? The first thing to consider is what type of makeup you need to do. For daytime make-up, you should use a couple of shades of eyeshadow and a dark brown or black pencil. Using a gentle pencil movement, shade the eyelash line and the mucous membrane of the upper eyelid. Visually, the eyelashes will appear thick, and the eyes will take on an expressive, beautiful shape. Apply shadows using a round applicator or brush. If you don’t know what tone suits you, you can use universal shades – these are considered gray and brown tones. To make your eyes look bigger, apply light shadows on the inside of the eye and dark shadows on the outside. Matte shadows in pastel colors look natural. For evening makeup, choose pearlescent warm or cool tones. The final step will be applying mascara to the eyelashes.
It usually uses tools such as:
- base for shadows;
- pencil or liquid eyeliner;
- eyeshadow palette;
- Mascara.
In the daytime version, only light shadows and mascara or only mascara can be applied. Evening or stage makeup is unthinkable without expressive wings and rich colors; it allows the use of false eyelashes or rhinestones. Also, the formal look should be combined with the outfit, hairstyle and accessories.
In complex eye makeup, after the base, eyeliner is applied, then the shadows are shaded. There are various makeup schemes - horizontal, vertical, “bird”, “smoky ice”, “banana”. Their use depends on the shape of the eyes, the distance between them, and the shape of the eyelid. The choice of mascara is determined by the natural thickness and length of the eyelashes. It can be lengthening, curling, or increasing volume. Waterproof swatches provide longer-lasting makeup. The color of the mascara may also vary. Thus, brown-eyed girls are recommended to use brown shades in daytime makeup. For a festive occasion, blue, purple, green or silver mascara may be useful. Particularly extravagant ladies even pay attention to the color red. Some manufacturers offer “2 in 1” products, consisting of a caring serum, which additionally increases the thickness of the hairs, and a coloring composition.
The shade of the shadows must be combined with the color of the eyes. Green-eyed girls need to use warm colors to create makeup. The beauty of green eyes can still be emphasized with the help of blue, gray, purple shadows. Brown eyes should be shaded with ash-gray shades and brown-beige colors. For blue eyes, cool-spectrum shades, such as smoky, white, and blue, are suitable. To achieve the desired effect when tinting your eyelashes, you can try several methods of applying mascara:
- vertical, in which the brush moves vertically relative to the eyes, that is, parallel to the hairs;
- blinking - rapid fluttering of the eyelashes when touching them horizontally with a brush;
- Zigzags - alternating movements of the brush left-right and up-down.
One of the final stages is lip makeup.
To highlight the natural beauty of your lips, choose light, but not very pale lipstick colors. Fresh shades are ideal for summer makeup or light makeup for every day. Choose light coral, sheer berry, peach or pink lipstick. As a result, lips should not look bright, but expressive. It doesn’t matter what a girl chooses – lipstick or gloss, both products are allowed to create classic makeup. If she prefers to use lipstick to get an even layer and a clear contour, it should be applied with a brush.
Lips can be pre-softened with balm and thus prepared for applying lipstick. There are also special scrubs with fine exfoliating particles that will delicately remove the stratum corneum and chapped skin. A lip liner pencil will highlight and, if necessary, correct their shape. Its color should match the lipstick or differ from it by several tones. A soft, well-sharpened lead will help achieve a clear outline.
It is important to carefully paint your lips with lipstick and cover their inner surface as much as possible so that the makeup looks beautiful and natural when talking and laughing. The first layer can be powdered or blotted with a cosmetic napkin, then apply another layer. This will make your lip makeup richer and more durable.
The shade of lipstick should be combined with the color of the shadows and skin tone. For each color type of appearance, there are recommendations for choosing cosmetics. For bright eye makeup, nude lipsticks are usually used, that is, lipsticks close to the natural color of the lips. For daytime make-up, you can limit yourself to liquid gloss or balm. Some people may like long-lasting lipsticks, but you should not overuse them, as they dry out the skin of your lips.
Blush - refreshes the complexion
Gives him a natural glow and completes his makeup. Their color is usually selected to match the skin tone: pink and beige are suitable for fair complexions, bronze or brown are suitable for dark complexions. By changing the direction and width of the strokes, you can adjust the shape of the face, visually stretch it vertically or horizontally, increase or decrease its width. The optimal intensity for applying blush is when it does not stand out on the face.
It’s not difficult to understand how to apply makeup beautifully and correctly. Their practical implementation will help to consolidate the acquired knowledge. With such skills, a woman will feel confident in any situation and will be able to make the desired impression on others.
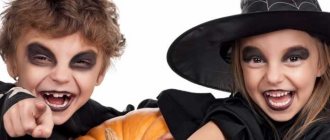
A vampire
The children's image of the main vampire on Halloween involves the use of three main color components: white, red and black. To begin, apply the white component to the face using a sponge. It can be made from a mixture of cornstarch, flour and 3 drops of glycerin.
To make the face more frighteningly pale, add a few drops of blue or purple food coloring to the composition.
Then, using liquid eyeliner or eyeliner, draw in the eyebrows, clearly defining two small arches. Dark gray or black eye shadow is used to cover the upper and lower eyelids. Makeup is applied to the cheekbones and chin using paint of the same color.
Another option
The lips are highlighted with bright red, and with a rich scarlet, using a thin brush, the fangs are drawn in the corners, depicting blood. If the streaks turn out to be uneven, you should shade them, imitating Dracula’s recent meal.
Children's Halloween party: how to organize
If you decide to throw a children's Halloween, first of all think about the guest list. The holiday will be especially successful if children of similar ages gather together.
Actively involve your child in preparing for the party. It won't be boring - neither you nor him!
Invitations and gifts
Create an atmosphere of a mysterious holiday even before the party begins: send themed invitations to your guests. You can buy them in a store or make them yourself. There are many options for invitations made with your own hands: figurines of owls, skeletons, pumpkins, bats. Mention in your letter that the party will be a costume party.
Give guests small gifts. Children of any age will be delighted by gummy worms or themed souvenirs.
Jewelry and crafts
Get your home ready for the party with crafts and decorations that are associated only with Halloween. The obligatory symbol of the holiday is a pumpkin with a carved face. The pumpkin can be depicted as good or evil; if your guests are preschoolers, choose a smiling pumpkin. The craft is simple to make: draw a face on a thin-skinned pumpkin and carefully cut it out with a knife.
Other Halloween Crafts and Decorations:
- stickers on windows similar to New Year's snowflakes; you can stick figures of ghosts, bats, black cats;
- pickled brain for older children - put cauliflower in a jar of tea and teenagers will be delighted;
- little ghosts - put pieces of white fabric on white helium balloons and draw funny faces for the ghosts;
- crafts made from autumn leaves - any kind, not just scary ones: animals, fairy-tale characters.
Cat
One of the popular images among little lovers of the mystical holiday is the image of a cat. The main features of the makeup are a mustache, a black nose and cat eyes. To make a cat baby make-up, you must first apply foundation to the face.
To do this, use standard products to even out complexion, for example, foundation or mousse.
To draw a cat's nose, paint over the tip of the child's nose with black, giving it a triangular shape. In the same tone, draw a thickened line downwards, ending it at the line of contact with the upper lip. Several lines are drawn from the nasolabial fold, imitating a mustache.
To give the eyes a cat-like almond-shaped cut, draw a clear line above the level of the eyelashes, bringing the tail up. Emphasizing the lips is optional. If you feel the look is not complete, apply a bright red, dark red or pink shade.
Captain Hook
The sinister pirate captain named Hook is the main opponent of the cheerful Peter Pan. You can create a costume for this character using available materials, the main thing is to get a wide-brimmed hat with a feather, the famous hook and a saber. A red frock coat can be replaced by a jacket or even a robe of a similar cut, matched with a wide contrasting belt.
To complete the captain's look, all you need is black paint and a brush or hypoallergenic brow pencil from your mom's makeup bag. Draw a curled mustache over the upper lip, add thickness to the eyebrows, drawing a curved line to emphasize the malevolent nature of the character.
You can use a thin brush to draw wrinkles on the forehead or get an eye patch, which will give the child a more “pirate” look.
Mummy
An interesting option for children for Halloween is mummy makeup. The main thing here is to properly create the look of wrinkled skin . To do this, prepare the preparation in the evening - dip a paper towel in the coffee and leave it to dry without squeezing. Using a wooden spatula, a mixture of corn starch and flour is applied to a small area of skin, and a piece of a previously prepared towel, slightly wrinkled by hand, is placed on top. The same principle applies to all remaining uncovered areas of the face. Next, the entire face and neck are wrapped in gauze, covering it with colorless powder on top.
Coming up with a costume
“Recognition” at the holiday depends on how detailed the Halloween outfit is thought out. Parents and children should show all their imagination and skill in making a costume. Using your creative abilities, you can make your own original, unique costume.
What can be useful for creating a costume?
- any old clothes that you don’t mind cutting or tearing
- pieces of fabric, ribbons, scarves
- socks, gloves
- hat, scarf, cap
- cloak, robe
- boots
- feathers
- pieces of leather, fur
- bandage, rope
- cardboard
- wire
- fake nails
- glitter accessories
- chains
- wings
- toy spiders, snakes, weapons
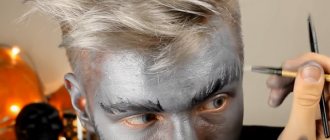
Witch
In most cases, the witch has an unhealthy complexion with a brownish-green tint. Therefore, for this type of makeup, a green base is applied. The cheekbones, nose and chin stand out. Brown spots are shaded on top with light touches of a sponge. Black or brown wrinkles run down from the inner corners of the eyes. Apply eyeliner to the eyelids. The eyebrows are darkened, giving them a heavy and voluminous appearance. The lips are highlighted with dark red lipstick and the look of a witch for Halloween is ready.
Clown
Children's Halloween clown makeup varies by type:
- Classical.
- Clown with non-standard eyes and mouth, beige complexion.
- A dark-faced clown with a sad expression on his face.
Regardless of the clown image you choose for your child for Halloween, the application technique will be identical for everyone. First of all, apply the first layer of white or flesh-colored makeup. Then, using a brush, dark colors are drawn on the desired areas, highlighting arched eyebrows, enlarged lips and rosy cheeks. Very often, for children's Halloween makeup, they draw a kind clown, which is characterized by a big smile. Using a black pencil and white paint you can draw large teeth.
History of the holiday for children
Halloween is more of a British holiday. The Celts in England began to celebrate it in the 9th century. For the ancient people, Halloween was its own New Year: people celebrated the end of the harvest and lit a sacred fire.
The Celts believed that it was on this night, from October 31 to November 1, that spirits descended to Earth. Different: good and evil. Angry spirits were supposed to be appeased, and people left treats for them at the door, and they themselves left the house, dressed in costumes made of animal skins.
Later, with the advent of Christianity, the history of Halloween became intertwined with All Saints' Day, and the holidays began to be celebrated at the same time. In the United States, Halloween has only been celebrated since the mid-20th century. But Celtic traditions are actively observed: children and adults dress up in scary costumes and go from house to house, playfully demanding sweets from their owners.
Halloween symbols
The main symbols of the holiday: pumpkin lanterns, scary figurines for decorating your home and yard, sweets in the shape of tombstones, monsters, insects. The main symbol since the times of the ancient Celts has been the pumpkin head, which is usually called the “Jack-O-Lantern”.
According to legend, Jack was the name of a not very decent man who lived in Ireland many centuries ago. The drunkard Jack even managed to piss off the devil - the Irishman was not allowed into hell after his death. But there was no way for him to go to heaven because of the abundance of sins. Since then, Jack has been walking around the world, lighting his way with a pumpkin lantern. They say that the devil himself gave the pumpkin with a smoldering coal inside to the sinner.
How to make a pumpkin for Halloween
Sketch of a classic Jack. Print, transfer to pumpkin and cut out!
What could a holiday be without its main symbol? A Jack Lantern will not only decorate a “scary” night, but will also gather the whole family around it, including children - after all, making this attribute is very easy, fun and entertaining! And what emotion Jack will display (creepy, cute, funny) is up to you to decide.
Step-by-step instructions on how to carve a Halloween pumpkin with your own hands:
- First you need to choose the right fruit. Pay attention to the absence of damage and rotten areas. The surface of the pumpkin should not be very hard, and the bottom should be flat so that the finished Jack-o-lantern stands confidently on horizontal surfaces.
- Carefully cut off the top of the pumpkin (you will need this “lid” in the future). You can first draw an even circle so as not to make a mistake with the shape.
- Through the resulting hole, remove all the contents of the pumpkin - pulp and seeds. To do this, it is better to use a spoon with pointed edges. Choose the side for the “muzzle” and “scrape out” the pulp in this place especially carefully. The thinner the wall, the easier it will be to cut out the “face” of the pumpkin.
- Take a marker or felt-tip pen and draw a face on the pumpkin. The classic version is triangular eyes and a smile with teeth. But you can show your imagination and make a unique pumpkin, giving Jack a creepy or, on the contrary, a cute expression. You can print ready-made templates (see options above).
- Using a well-sharpened knife at a right angle, cut out the details of the face according to the previously drawn sketch.
- If you want to extend the life of your holiday attribute, coat all edges with Vaseline. Make small holes on the lid of the lamp (see point 1) so that the heat from the candles can escape through them. If desired, the “insides” of Jack can be rubbed with cloves and cinnamon so that the pumpkin not only disperses the shadow, but also smells fragrant!
- Light and insert a suitable size candle inside (make sure it is level and secure). Life hack: to make the candle burn longer, first keep it in the freezer for a couple of hours.
- Cover the lantern with a lid. Ready! Now the "face" of the Jack-o'-lantern has found life and seed.
Find more ideas, pumpkin templates and visual master classes in the article How to carve a pumpkin for Halloween: simple and effective ideas!
Traditions
Trick-or-treating has been a tradition that has accompanied Halloween since the beginning of the holiday. But then beggars begged the owners of the house for sweets.
Only in the 19th century did adults begin to go from house to house for candy; a century later, children got involved. Teenagers, younger children and very young children beg for sweets in scary and simply fabulous costumes: sorcerers, vampires, heroes of fairy tales and films.
In the USA and European countries, girls on Halloween tell fortunes about their betrothed; the ritual is similar to Epiphany in Russia. Children and young people play traditional games for the celebration: “The Mummy”, “Catch the Witch”, “Dracula’s Meal” and others.
Treats
Traditional treats for those begging for sweets are caramel apples on a stick and fortune bread. Apples on a stick are especially good because even small children can make such a festive treat.
Since the middle of the last century, unusual sweets for Halloween have come into fashion: finger-shaped cookies that imitate brain jelly, gummy worms, and everything that the confectioner’s imagination can conjure up.
Doll
Another common Halloween makeup for girls is a doll. A foundation is applied to the face that matches the child’s skin tone. The lips are covered with a small layer of powder to give them a slight pallor. The cheekbones are highlighted with pink blush. The eyes are drawn using a black pencil (lines on the upper eyelid) and liquid eyeliner (large eyelashes are drawn on the top and bottom of the eye). The inner corners of the eyes are highlighted with a shimmering white shade. Lip makeup comes down to applying a dark red or pink shade with a brush in the center of a small circle.
Doing your hair
Equally important is choosing a Halloween hairstyle that will complement your chosen look. If you don’t want to devote time to this issue, then you should use a headdress that matches the costume, or a wig. If you decide to do your hair yourself, then use these tips.
- For scary images, use a comb to comb your hair, tousle it, and fix it with hairspray.
- Using colored mascara and tint foam you can color your locks.
- The extravagance of the image is emphasized by sparkles in the hair.
- Hairpins with skulls, spiders, and pumpkins will complement your Halloween look.
- A headband with horns and ears is perfect to complete the costume.
Spider-Man
A common Halloween look for boys is Spider-Man. Without forgetting to first apply protective baby cream to the child’s skin, contours around the eyes are drawn with thick black paint.
Then we cover the entire face with red paint, avoiding only the outlined area around the eyes. You can apply the paint with a sponge, cotton pad or your hands . Next, the “eye sockets” are shaded with gray or white paint. The final touch is to draw black lines representing a web.
Now all that’s left to do is choose the Halloween makeup you like together with your child and start making it. Good luck to you and have a happy holiday!
Little Count
Creating a vampire costume will require looking into mom and dad's wardrobe. As you know, ghouls have a passion for long dark cloaks and blood-red clothing details. A bright shirt or vest will suit the look. A formal bow tie around the neck, a tuxedo and a stand-up collar would look appropriate.
The process of applying makeup for Dracula is a bit like constructing a skeleton:
- Start with a white base. Cover the entire face with it, but not as thickly as for the skull. Remember that you want to achieve "noble pallor".
- Feel free to apply details on top of the whitewash that will highlight the character. The vampire's expressive eyebrows are thick and arched, his eyes are shaded.
- Emphasize the sunken cheeks and highlight the mouth in red.
- Don't forget about false fangs! This is the most characteristic detail of the character.