When going to a costume party, people think about what image to choose for themselves. Trivial cats, bunnies and pirates are no longer relevant. What character can you dress up as? It is worth considering the candidacy of an elf. This outfit is easy to make, you just need to find a light wig, a long white robe and ear pads. And while purchasing a wig and finding clothes is not difficult, hairpieces can be a problem. And it's easy to solve. In this article we will tell you how to make elf ears with your own hands.
Cuffs
The easiest way to make elf ears is to twist them from wire. Of course, this option is more suitable for girls than for men. Cuffs are a beautiful decoration that today replaces ordinary earrings for many people. These accessories are attached using clamps or due to their curved design. How to create such elf ears? To make them, you will need silver wire. If this is not available, you can get by with copper, and when the product is ready, it can be spray painted. So let's get started. First, you need to make a leaf-shaped frame from wire, and then start filling it. We make all kinds of curls and attach them to the base. Now you need to think about fastening. You can use a clip for it or build a similar part yourself.
Alternative methods to get elf ears
If you want to have an unusual ear shape, you don’t have to immediately rush to the surgeon. There are safer ways to make them elven temporarily:
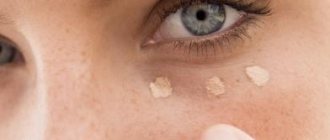
The powder is diluted in water until a thick mass is obtained. It is applied to a plasticine model and kept for 2 days. Then construction silicone is mixed with foundation. This mass is placed in a plaster mold cleared of plasticine and kept until it hardens for 3-4 days. At the end, the solid model is broken. The removed silicone ears can be used. They are attached with cosmetic glue. And foundation is applied to the border between the silicone jewelry and the skin.
Before asking a doctor to get elf ears done, it is worth assessing the consequences of the step. The operation is associated with many risks, pain, and has many contraindications. In addition, ears can negatively affect the career and perception of their owner by other people, presenting him as a frivolous person. And the desire to have an unusual appearance sometimes quickly passes.
Papier-mâché ears
Even children can make such a “decoration”. The elf ears in this version are made of papier-mâché. But the base will have to be made of plasticine. We sculpt a model, which we will later paste over. You can make the same long ears as shown in our example, or you can make something shorter and more elegant. When the base is ready, grease it with any fat. This could be hand cream, sunflower oil or butter. We prepare paper. To do this, take a newspaper, cut it into small pieces and fill it with water. Let's give this substance time to brew. Now you need to take the base and stick the first layer of paper on it. When it dries, coat the newspaper with PVA glue. Let's add another layer. Again, wait for it to dry and repeat the procedure. When everything is ready, leave the workpiece to dry completely in any warm place. The next stage is freeing the ear from the base. Carefully remove the plasticine. We make the second blank by analogy with the first. The ears are almost ready, all that remains is to paint it with acrylic paint. You can use gouache for this purpose.
Recovery after surgery and care for elf ears
Otoplasty is a traumatic operation. In addition, cartilage takes a long time to grow together, especially in such an unnatural position for them . Therefore, rehabilitation lasts at least 3 months. During this time, the patient should:
- take care of the sutures, treating them with chlorhexidine twice a day, getting rid of blood stains with hydrogen peroxide;
- take painkillers (not analgin), but not too often;
- after 9 - 12 days, come to the clinic to remove the stitches, but even after that continue to care for fresh scars using the same products, as well as Actovegin ointment, Traumeel S gel;
- after treatment, apply a fixing bandage and do this for 3 months;
- protect your ears from any mechanical impact, that is, do not sleep on your side, do not wear tight hats;
- do not drink alcohol, do not smoke, limit coffee in your diet;
- do not undergo thermal procedures, that is, refuse a hot bath, visit the bathhouse, solarium and beach;
- To smooth out scars, apply Contractubex gel to them a few days after removing the sutures.
We recommend reading the article on how to do it. From it you will learn about the types of otoplasty, ear shapes that can be corrected, preparation for the operation and its implementation, and also compare which is better - a surgical solution to the problem or a laser.
Plaster ears
Brilliant ideas are always very simple to implement. How to make elf ears? The easiest way to make them is from regular plaster. It is best to take a coterite one or one that matches your skin color. We take a thin strip and glue it to the auricle. We bend the ends of the patch inward and cut off the excess with scissors. That's all - the ear is ready. If it does not quite suit your skin color, then you can paint it with powder or shadows. The use of foundation is not recommended. It will not be absorbed into synthetic fabric.
The essence of the operation to change the shape of the ears to elven ones
The intervention is performed under local anesthesia. But it involves the implementation of more complex actions than when correcting protruding or ugly ears. First, the changes are simulated on a computer, and the lines along which the cuts will be made are identified. Next, the process moves into the operating room:
During the operation, an important point is the tension of the cartilage. If it is not strong enough, it will not be possible to achieve the desired result, because these tissues are elastic. Therefore, the tip of the ear always curls up more than it should.
Gummous ears
Interesting name, isn't it? What is gummosis? This is theatrical plastic. Not only false ears are often made from it, but also noses, cheekbones are sculpted, etc. Working with this material is as easy as with plasticine. How to make elf ears from gummose? We put a shower cap on the model so as not to stain the hair. Now we take the gummosis and fashion the sharp tip of the ear out of it. It should serve as a continuation of the model's auricle. When the work on creating the form is completed, you can begin to cover it with latex. This is necessary in order to give the workpiece a more realistic look. Apply 5 to 7 layers of liquid latex, allowing each of them to dry thoroughly. At this time, you can create an overlay for the second ear. When everything is ready, you need to sprinkle the latex with baby powder. Carefully remove the workpiece. Now you can paint it to match your skin tone. For this we use acrylic paint.
What you need to know about the operation
First, let us draw the attention of those who want to transform their image to the negative aspects of such plastic surgery.
If these disadvantages do not scare you, then you are the person who should get acquainted with the advantages of plastic surgery to create elf ears. Your friends who are fans of “The Lord of the Rings” and “Star Trek” will love the pointed ears; you will always be the center of attention among your like-minded people. For those who have problems, for example, the upper part of the ear is too large or defects due to injury, this is an excellent solution and an original corrective solution.
Paper ears
What should you do if your child comes home and says he needs a suit by tomorrow? Invite him to become an elf. The costume can be made in just half an hour. Making your own elf ears out of paper takes just 10 minutes. To make them you will need a color printer. Print out the picture above. Now cut out the ear along the contour. And don't forget to make a slit along the dotted line. It is thanks to this notch that the pad will stay on the ear.
How is the operation done?
Before surgery, it is necessary to do blood tests - general and biochemistry, urinalysis, X-ray and ECG. The auricles are given a pointed shape using incisions. The surgeon first models the shape on a computer, coordinates it with the patient, and marks the incision lines. The operation is performed under local anesthesia and the client feels virtually no pain.
The surgeon anticipates all possible complications, one of which is cartilage tension. It is due to the fact that the tissues tend to return to their natural position, and the modeling may not take place. Therefore, the shell collapses more than necessary by almost 80%. After stretching the cartilage, exactly the sharpness that was planned to be achieved will be formed.
Ears made of self-hardening clay
Every needlewoman knows what plastic is. But not everyone knows what self-hardening clay is. This is a synthetic material that is similar in physical properties to ceramics, but it does not need to be heat treated. You can make your own elf ears from self-hardening clay. Just remember that the material is heavy, so you need to handle it carefully. After all, if the pad is too thick, it will simply fall off the ear. Therefore, the base should be made of foil. We give it the shape of a triangle, and then cover it with a thin layer of self-hardening clay. The shape of the ear should be taken into account, so do not forget to make the pad embossed. After the workpiece has dried, it will need to be painted. For this purpose, you can use acrylic or pastel. Both will need to be coated with a transparent matte varnish. This type of overlay must be attached using leather glue.
Useful video
Watch the video of a psychologist's opinion on why people get piercings and elf ears:
Source
Elf ears are the fashion trend of the season. It is popular among those who prefer a body style modification. Such otoplasty is not approved by doctors, since from their point of view it disfigures the natural appearance of a person. It can only be justified if a person has congenital or acquired defects of the auricle. But people who like to be different from others have their own opinion and consider elven ears to be an adornment to their image. Therefore, plastic surgery to change the shape of the ears is becoming an increasingly popular service, along with piercings, tattoos and other modern methods of modeling appearance.
Content
Advice from a Plastic Club expert: our plastic surgeons do not “chase” fashion and trends. We don't do such operations. Because We are only for plastic surgeries that are indicated.
If we are in a trend, it is only in the world of scientific medical technologies.
Origami ears
To make such overlays you do not need to have the talent of a sculptor. Making elf ears out of paper takes just an hour. You need to print the stencil shown in the first picture. It is best to make ears from thick paper or soft cardboard. We cut out the blanks. Place the pattern with the cutout facing to the right and use a utility knife to draw a triangle at the top. We bend the workpiece along it, and do the same with the second part. Glue the parts together and bend the semicircular protrusion outward. To give the workpiece the shape of an ear, you need to hold it in water for a while. We take out the future ear and try it on. If necessary, it can be slightly deformed. We use the same principle to make the second ear. Finished products can be painted, or left in white or brown.
Wood Elf Costume
Little spirits of the forest, according to legend, are dressed in green clothes made of leaves, funny boots with rounded toes and caps.
You can sew a tunic from green fabric yourself, but the easiest way is to buy a large green T-shirt. Draw a zigzag on the hem of the T-shirt and cut it out to simulate a ragged edge. The tunic can be belted with twine or a belt made of green fabric. A girl can wear thick green tights under a T-shirt, and a boy can wear green shorts or leggings.
To sew a pointed hat, buy thick green felt or felt. Cut out 6 identical triangles from it and sew them together along the long sides. You can sew a bell to the end of the cap.
Removable ears
And finally, we’ll tell you how you can combine the two technologies. Namely, how to make removable elf ears with your own hands. We will make them from self-hardening clay on a cuff. We twist the wire into the shape of an ear. And now you need to stick a triangle on it, which will visually make the auricle long and sharp. If the clay dries out during work, it can be moistened with water. Be sure to make plugs on the wire so that it does not scratch your ear. When the product is dry, it should be painted in flesh color. How to wear such an accessory correctly? One side of the wire clings to the auricle, and the second part of the wire rests on the cartilage located next to the earlobe.
Tools and materials Time: 1 hour • Difficulty: 5/10
- aluminium foil;
- baked flesh-colored polymer clay (1 block);
- rolling pin;
- awl;
- fishing line;
- metal rim;
- universal glue or glue gun.
These elf ears are perfect for celebrating New Year, Christmas and for kindergarten and school matinees! Create these ears for your child for a holiday - and your child will be delighted!
You will need: