Home » Face
Category: Face
If heavy contouring isn't for you, strobing may be a makeup trend you can consider. Instead of using bronzer or other dark powder to make your face look more angular, strobing uses highlighter to add light to your face for an extra dimension. But shimmery products can make your face look oily, so it's important to know exactly where to place your highlighter and what shades to use when you strobing.
- What is strobing in makeup?
- Features of the strobing technique in makeup and its difference from contouring
- How to do strobing in makeup: step-by-step photos
- Preparing for makeup using strobing technique
- How to apply strobing to the face: step-by-step video instructions
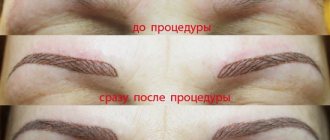
- Strobing style makeup: before and after photos
- What strobing products should I use?
- How to choose a highlighter shade for strobing your face
What is strobing in makeup?
Strobing has caused a bit of a stir online, with many makeup fanatics wanting to try this new trend. On the other hand, many makeup artists agree that strobing isn't really a new trend—it's essentially highlighting, but with a slight twist.
- How you want to wear your backlight determines whether the technique is “backlit” or “strobe.”
- Both methods use highlighting basically everywhere - at the top of your cheekbones, brow bone and brow bone, on the bridge of your nose, in the bridge of your Cupid's nose and chin.
- The main difference is that highlighting is usually paired with contouring, while strobing highlights purely on its own and typically has a very dewy finish thanks to brightening creams or serums mixed into the base to add more depth.
- An easy way to differentiate is to remember this: the highlighting goes hand in hand with the outline, while the strobing is applied on its own.
Now let's look at some facts:
- Strobing means 'extreme glow' and is the new 'hot' technique
- The technique uses shimmery highlighter shades to highlight features, creating the illusion that the face is contoured without actually defining the features. Instead, it brings all your features forward and leaves a dewy, glowy finish.
- Strobing is a technique that uses only light to enhance your face; There is no bronzer or dark powders here.
- The result should be dewy and fresh, as if you were lit from within. Avoid harsh shimmer or chunky glitter, as strobing is all about creating a soft, radiant glow.
Remember, the beauty of both strobing and contouring is that you don't have to limit yourself to products that focus on adding color to your cheeks. Highlighting brow pencils works just as well blending into the nose, chin and forehead as tapping a light highlighting cream powder onto the cheeks.
So now you know the difference between the two methods, play around with both a little before discovering the one that suits you best!
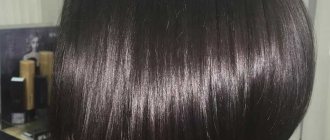
Dyeing technology
The choice of dyeing technique is based not only on an analysis of the oval of the face, but also the natural shade of the hair. There is a single dyeing scheme, which can be modified depending on the natural shade of the hair. Strobing is done using the following technology:
- a technique is initially selected that is based on a detailed analysis of the appearance features;
- hair is collected in a ponytail;
- the necessary strands are pulled out one by one, which will later be dyed;
- paint is prepared and applied using a special brush;
- the strands are wrapped in foil one by one and left in this position for a certain time;
- The foil is unrolled and the paint is washed off.
Now it’s worth considering the features of strobing depending on the natural shade of the hair.
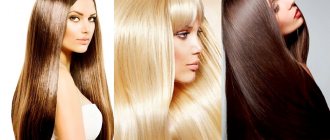
- Black hair is one of the most difficult options. In this case, the strobing technique turns out to be multi-stage. Black hair needs to be lightened, often this procedure is divided into several stages: otherwise, you can burn your hair. After lightening, the paint is selected in accordance with the resulting shade.
- Dark hair does not need lightening; the result from strobing will already be good. The master can only choose the right shades of paint.
- Red hair is least suitable for strobing. Such hair is already bright, so choosing the right shades is not an easy task. For bright red shades, brown tones with a honey tint are most suitable. Gray-red hair is shaded with dark brown dyes. In the case of natural shades with a red tint, blonde color options are selected.
Features of the strobing technique in makeup and its difference from contouring
Strobing is essentially applying shimmery highlighter to the high planes of the face where light will naturally reflect.
Unlike mega-corrector-bronzer-contourers, which look great in photos but unnatural and heavy in the daytime, strobing works great in real life because the light always catches and bounces off your skin. The highlighter simply enhances the reflective glow.
Strobing is different from contouring because no dark shades are used. Instead, bright highlights are placed on areas of the face where light naturally hits to create an illuminated complexion. These areas include the tops of the cheekbones, temples, center of the nose, and Cupid's bow.
Its origins come from the red carpet scene. This trend is about healthy-looking skin, not the sculpting you get with contouring. When you first highlight, the contours of your face naturally come forward.
And what is the result? Skin that looks like it's glowing. It's important to use different strobing shades based on your complexion. This ensures that skin looks bright and radiant, rather than too tight or ashy and dull. People with fair skin tones should focus on white and pink-beige shades. Those with medium skin tones look best in bronze beige to gold shades. Meanwhile, gold to peach and orange shimmers stand out on dark skin tones.
How to do strobing in makeup: step-by-step photos
- If you have very oily skin, it helps to apply a mattifying primer before your foundation. This will help absorb any excess shine throughout the day.
- If you really want the glow from strobing makeup to stand out, pair it with natural, minimal makeup. Choose matte, neutral eye shades and a lip color that is similar to your lips' natural shade because glow is the first thing people notice.
- Applying some of your strobe highlighters down the center of your calf can make your legs look longer and thinner.
Strobing should be the last step in your makeup routine, so it's used on top of all the other products you're wearing (foundation, blush, etc.).
Before you strob, it's important to matte areas that you don't want to highlight, such as your forehead, chin, and the tip of your nose. Otherwise your whole face will just look greasy. You should do this before applying your foundation, tinted moisturizer, or BB/CC cream.
Advantages
The strobing effect is achieved through the use of light shining powder or highlighter. It does not allow clear definition of the cheekbones. The purpose of this makeup is to visually enlarge the lips (we wrote about this separate technique earlier), make the nose and eyes more expressive, and slightly raise the cheekbones.
In addition, applying highlighter helps give the face a natural glow that is easily distinguishable from the reflections of oily skin. In order to achieve such a result, it is not at all necessary to have a huge set of brushes - you can even shade the strobing products with your fingertips.
The advantages of the technology include:
- no artificial or mask effect;
- small amount of time spent;
- the skin will glow with freshness and health;
- imparting sexual moisture to the face;
- helps to advantageously emphasize or hide certain facial features;
- can be used both for an evening look and in everyday life;
- no need to use a large amount of toning products before facial strobing.
Preparing for makeup using strobing technique
Step 1: Moisturize your face
Because strobing draws attention to your skin, it's important to make sure it's properly hydrated so your makeup doesn't look patchy or sticky. Before applying any makeup, use a moisturizer to make sure your skin looks smooth and healthy.
- If you have oily skin, choose an oil-free moisturizer to avoid clogged pores.
- Wait at least 5 minutes after moisturizing your skin before applying any other makeup to ensure the moisturizer has been fully absorbed.
Step 2: Apply foundation
Your skin should be as even as possible when you apply highlight makeup, so use foundation first to even out your skin tone. It's best to use a matte formula because it allows the shimmer and glow of your strobing products to stand out against it.
- If your skin is mostly clear, you can substitute a light tinted moisturizer or BB cream for your foundation.
- Use a sponge or brush to blend the foundation into your leather for the most flawless finish.
Step 3. Cover all imperfections with concealer
Your foundation can't hide all the discoloration on your face, so apply a concealer. Apply it to pimples, scars, dark circles and any other areas of hyperpigmentation and blend well.
- You can use a sponge or brush to apply the concealer, but using your fingers usually results in a smoother application because the warmth of your skin helps the product blend most effectively.
Recommended cosmetic products from the Maybelline brand
Maybelline is a popular brand of decorative cosmetics in Russia, which is popular with women due to its optimal quality-price ratio. What products deserve the attention of those who prefer strobing makeup?
- Maybelline New York Master Strobing Stick Highlighter. Produced in light mother-of-pearl (tone 01) and beige champagne (tone 200) colors. It is characterized by its low cost and convenient packaging (case in the form of a stick). One light touch is enough to apply to the face. The undeniable advantages of this highlighter include the following factors:
- does not pollute pores;
- does not dry out the skin;
- “adjusts” to the original complexion, so it looks natural;
- dense structure;
- is used economically;
- gives freshness to the face;
- perfectly models and transforms the face.
- Maybelline New York Master Sculpt Compact Powder.
This product is perfect for those with oily skin. The light texture of the powder gives the appearance a natural shine and freshness. It is durable: makeup lasts for several hours. A soft brush blends the powder efficiently. Thanks to the powder, the oval of the face becomes refined and natural. The company also produces other products necessary for strobing: concealers, shimmering shadows, special sets of shadows, brushes.
The strobing technique is another way to emphasize the individuality of your appearance and make your facial features softer and more natural. The technique allows you to look younger and fresher. Each product comes with instructions that describe in detail how to use the sticker or shimmering powder. As a rule, it does not take much time to understand the technology. If there is insufficient information, it is recommended to watch videos teaching this makeup.
How to apply strobing to the face: step-by-step video instructions
Step 1: Apply cream highlighter to the high points of your face
For the most natural strobing effect, it is best to use a cream. Be sure to choose one shade that matches your skin tone and apply a small amount to the top points of your face, including the tops of your cheekbones, temples, eyebrows, bridge of the nose, and just above the center of your upper lip.
- You can also apply highlighter to the center of your forehead and chin for an extra glow.
- If you have oily skin, you may want to skip the highlighter on your forehead, nose, and chin because these areas tend to become shiny on their own.
- If you have fair skin, choose a highlighter in a champagne shade.
- If you have fair to medium skin, choose a highlighter in a champagne pink shade.
- If you have olive skin, choose a highlighter in a golden shade.
- If you have dark skin, choose a highlighter in a bronze or terracotta shade.
Step 2. Mix
Once you have applied the highlighter cream to the high points of your face, you need to blend it out to make it look natural. Use a damp sponge or synthetic stippling brush to gently apply the cream to your skin for a smooth finish.
Step 3: Apply dry highlighter on top of cream highlighter
Once you have completely blended the highlighter cream into your skin, you can intensify the glow by adding a powder highlighter to it. Use a powder in the appropriate shade and lightly dust it over the cream using a small fluffy brush.
- If you have dry skin, you may want to skip dry highlighter because it can look patchy or sticky in dry areas.
Step 4: Apply matte blush to your cheeks
To make sure your strobing makeup takes center stage, it's best to use matte products on the rest of your face. For a healthy look, apply matte blush in a shade that suits your skin tone, starting at the apples of your cheeks and sweeping back toward your hairline under your highlighter.
- An angled blush brush usually provides the most precise application.
- For fair skin, choose a light pink or peach blush
- For light to medium skin, choose a mauve or apricot blush.
- For olive skin, choose a coral blush.
- For dark skin, choose a deep orange or berry blush.
Step 5: Use bronzer sparingly
When you're strobing, you're usually not using any type of contouring product. However, if you feel like your skin needs some warmth, you can lightly apply a small amount of bronzer. Swipe it along your temples, under your cheekbones, under your blush, and along your chin.
- Just like with your blush, use a matte bronzer. You don't want any shimmer or shine to compete with the highlighter.
Step 6: Set unlit areas of the face using translucent powder
To reduce shine and set your makeup, apply translucent powder. However, you should not apply the powder to the areas where you have highlighted. Use a fluffy brush to lightly dust the translucent powder over the rest of your face.
Contouring – the magic of the play of light and shadow
Contouring is a makeup technique for creating the perfect image by darkening and highlighting certain areas of the face. The modeling technique allows you to hide imperfections, adjust visual volume, and straighten lines. It makes it possible to “sculpt” features like a sculptor by placing accents, which is why it is called sculpting.
For contouring we use liquid and dry corrective products. With the help of dark concealers we can reduce the length and width of the nose, “hide” a wide jaw, and correct a high forehead. Light-colored concealers increase volume, highlight the bridge of the nose, the V-shaped area between the eyebrows, and the arch above the upper lip. The contouring technique helps solve most aesthetic problems, change the visual sense of proportions, the shape of the oval of the face, the shape of the eyes, nose, and cheekbones.
An oval face is ideal. However, we know that every beauty has unique shapes. Makeup products and contouring techniques allow you to correct a round, triangular, square, rectangular or pentagonal face and get the correct oval. In each case, the central zones are highlighted, and the areas protruding beyond the classical form are darkened.
Contouring a face of any shape begins with standard preparation: cleansing, toning, moisturizing. The prepared surface is covered with a makeup base. If you use liquid concealers for sculpting, apply the powder after completing your face sculpting. Dry cosmetics (bronzer and highlighter) are applied to powdered skin. Then the usual makeup is performed for a day or evening out.
What strobing products should I use?
There are three rules for choosing the ideal strobing product:
1. Avoid anything shiny. The point is to create a subtle shimmer that could be mistaken for naturally glowing skin.
2. Keep in mind your skin type . I personally love cream formulas for ease of application and portability, although they tend to be best suited for normal to dry skin types. Dry highlighters are likely to last longer on combination or oily complexions.
3. Choose a highlighter that matches your skin tone . Stick to a highlighter that matches your undertones.
What you need for strobing
Use the Beauty blender Micro Mini to blend your strobing
Dry highlighter
Liquid highlighter
Related materials:
MAC | Benefit | Giorgio Armani | Urban Decay | Kendall Jenner | Gigi Hadid | Miranda Kerr | poppy | Benefit | Giorgio Armani | highlighter | strobing | contouring | traits | dignity | disadvantages | disguise | Shine
Articles
- Perfect nude: how to choose lipstick June 10, 2015, 00:00
- Royal beauty secrets January 16, 2016, 00:00
- Makeup for redheads August 02, 2016, 00:00
Video
- Amazing Blendmania by Giorgio Armani May 20, 2014, 4:00 pm
- Bright summer makeup from Giorgio Armani July 02, 2014, 16:30
- Beauty with character from Urban Decay December 14, 2015, 15:00