Home » Face
Category: Face
How many times have you tried to put on makeup on your cheeks and they turned out red like a nesting doll? Did you really think that only professionals can build the correct contour? It's time to think again! Contouring is all about using the right combination of shades in the right parts of your face to create a more highlighted effect that adds some shape and dimension to your face. And yes, anyone can do it! In this article we will look at how to highlight cheekbones with makeup using contouring, blush and highlighter.
- How to highlight cheekbones with makeup
- How to highlight cheekbones with blush
- How to highlight cheekbones with highlighter
- How to highlight cheekbones with contouring
What to do with excess fat on your face?
To some people, the problem of facial fullness seems far-fetched, which is completely unfair. Fat accumulates not only on the hips, stomach, and arms. Its excess appears on both the chin and cheeks. The result of this is the loss of a clear oval, the impression that the cheekbones are completely absent. Neither women nor men want to put up with such a situation.
Considering the seriousness of the problem, since fullness of the face really spoils a person’s appearance, there are a huge number of sites, methods and even books devoted to this problem. Most of these benefits suggest that people who want to get rid of a double chin and prominent cheeks perform special exercises that reduce body fat.
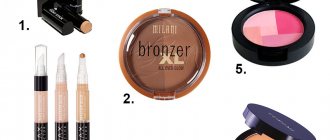
How to use a concealer palette: step-by-step video
Step 1: Apply moisturizer and foundation to refresh your skin
Squeeze a small amount of moisturizer onto your fingertips and massage it generously into your face. Work from the center of your face outwards to ensure you get full coverage. Use the same strategy to add foundation after moisturizer.
- Since the primer serves as a base for your concealer and foundation, you only need a thin layer
- Look for lotions labeled non-comedogenic as they won't clog your pores.
Step 2: Create your makeup in thin layers
Avoid creases in your concealer and other makeup by applying your product in thin layers. Always start with less product than you need. It's much easier to add makeup than to remove excess makeup.
Step 3: Apply orange concealer to cover your lower eyelids.
Apply a small rounded brush to the surface of the product and form a triangle directly under the lower eyelid. The triangle should point towards your chin, and should stop slightly below your nose. Fill the triangle with 2-3 more strokes of orange concealer. This helps your face look fresher and more toned.
- Don't swipe your concealer in a straight line over your lower eyelid, as this doesn't make your face look lifted.
- If you plan to use more than one concealer color, be sure to wash your brushes between uses.
- Depending on your skin tone, you may want to choose a different color to hide your under-eye bags.
Step 4: Apply a green dot to the center of the pimple
Dip into your palette with a rounded makeup brush to apply enough makeup to cover the surface of your acne. Avoid applying concealer to surrounding areas of skin as this may spread more acne-causing bacteria. Use a cotton swab to apply a drop of concealer.
For more precise application, purchase a correction pen or chalk.
Step 5: Apply green concealer to cheeks, forehead and chin
Eliminate large patches of redness by sketching a V-shape over prominent areas of your face. Use a rounded makeup brush to dip into your palette. When blended, the sharp curve of the concealer conceals redness across the entire face, forehead and chin. Take a small makeup sponge and lightly blend over the green in a circular motion.
Step 6: Apply yellow concealer to your cheeks to cover any redness.
Lightly tap your palette with a small, rounded makeup brush to add concealer in long, sweeping strokes. Create a diagonal line that starts 1 centimeter below the corner of your eye and ends near your earlobe. Take a makeup sponge and blend the concealer into your skin in long, smooth strokes. Do this until the yellow color is no longer visible on the skin.
- If your cheeks are particularly red, apply a thinner, parallel line of concealer below the starting line.
- Buy a yellow concealer pencil if you don't want to use a palette and makeup brush.
Step 7: Apply lavender concealer in small circles along the yellow areas
Use a small, rounded makeup brush to draw small circles along your forehead and the area between your nose and lips. These areas tend to appear yellow on medium and darker skin tones. People with lighter skin tones should focus on applying lavender concealer to the edges of their cheeks, right next to their ears. Blend the concealer with a makeup sponge, using fine strokes to work the concealer into the skin.
Step 8: Cover dark vein spots with pink concealer
Apply tiny, pea-sized dots of concealer to under-eye bags and visible veins using a small, rounded concealer brush. Pink concealer works best on fair-skinned complexions, as shades like blue are more visible through lighter skin. Take a medium size makeup sponge and press on the concealer in small, quick movements to blend it. Read on for a complete guide to using concealer for the face and under the eyes with video tutorials.
Those with darker skin tones should opt for yellow, orange and peach shades of concealer
Create beautiful cheekbones
We figured out how to remove cheeks using exercises at home. Now you can think about how to create high, beautiful cheekbones. And although plastic surgeons insist that this cannot be done at home, this is not true.
Facelift is a unique thing that can work wonders. Of course, it will not be possible to achieve the desired proportions in all cases - not everyone has an ideal skull structure - but with a certain patience and regular implementation of the complex, the effect will be, as they say, “on the face.”
For cheekbones
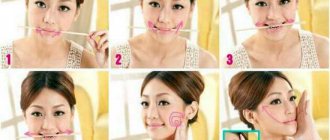
In the photo: exercise for cheekbones
The following exercises will help you get beautiful cheekbones and tighten weakened muscles:
We suck in our cheeks. Lips tightly compressed. And with such an expression on our face we diligently try to portray a smile. We fix the position for six to eight seconds and relax. Repeat the movement three to four times. We take a mouthful of air and purse our lips. We begin to move air in the mouth for two minutes. We smile as widely as possible, imagining that the corners of our mouth reach our ears. At the same time we make big round eyes. We stay in this position for ten seconds. The number of repetitions is also ten. First, we pronounce the letter “O” out loud, giving our lips the appropriate shape. Then we say the letter "X"
Please note that all facial muscles must work. Repeat 10 times. Place your fingertips on the surface of nasolabial wrinkles
Smile and fix your skin. At this moment you should feel resistance and tension in the cheekbone muscles. Hold the position for half a minute. Repeat the movement five times. The mouth must be open. We tilt our heads back and close it. We return to the starting position. Repeat the exercise at least twenty times during the day.
The complex will help to form beautiful cheekbones, as if to lift them. But in addition to classes, you need to adhere to some rules:
- you need to drink a lot of water to remove swelling;
- follow the principles of proper nutrition.
Exercises can be done at any time of the day: while cooking, watching TV, working at the computer, etc.
Read about what lymphatic drainage massage is and who it is recommended for.
For outline
In the same topic, you can also touch upon the method of home pumping of the main muscles that are responsible for the contour of the face.
- Place three fingers on the top of the cheekbone. The large one is placed in the middle of the cheek. Now you need to grab the skin and move it down a little, lightly squeezing with your fingers. You need to perform this movement against the backdrop of a wide smile. We fix the position for five seconds. Repeat twenty times.
- We sit straight, shoulders thrown back, chin slightly forward. You need to open your mouth a little and put your lips on your teeth. This is the starting position. Now place your index finger in the middle of your chin and open your mouth wide. At the same time, we raise our eyes to the ceiling and squint our lower eyelids. Apply pressure with your finger and fix the force for thirty seconds. Repeat the exercise twice a day.
- Mouth closed. The cheeks are drawn in and pressed against the teeth as much as possible. Now we place the inner surface of the palms on the cheeks and press. Hold the position for six seconds. The number of repetitions is ten times. This exercise helps fill out the cheek cavities.
Here is another great version of face exercises on video:
By the way, for elastic skin, you need to add nuts and definitely protein foods to your daily diet.
Where to buy highlighter and its prices
Corrective cosmetics are sold in specialized departments of supermarkets, in online stores, on the official websites of manufacturers, and in other retail outlets. Any girl can put together her own individual beauty set.
Prices vary widely. There are ready-made sets (palettes), the cost of which varies from a couple of hundred rubles to many thousands. The former are considered budget quick makeup products. The latter are considered elite and are designed for professional makeup artists.
How to get beautiful cheekbones with makeup
How to highlight cheekbones with blush
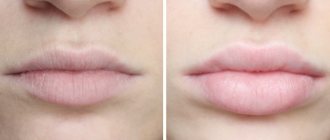
The most natural way to highlight your cheekbones and at the same time create the effect of a fresh and youthful face is to use blush. It is necessary to take light and dark shades in the same color scheme. For example, pink and dusty red. You will find both shades in the High Definition line from NYX Professional Makeup.
1 Apply a light shade of blush to the apples of your cheeks and blend diagonally up towards your temples.
2 Apply dark blush under the cheekbones and blend towards the corner of the lips on each side. Softly blend the borders between the two shades. This correction with dry blush can be conveniently done using a natural brush with a beveled edge.
Despite the fact that this correction does not create the “shadow effect” that a brown tint usually gives, the face still looks thinner and the cheekbones are noticeably emphasized.
Correction of cheekbones with bronzer
Highlighting your cheekbones while achieving a well-rested look is easy with a concealer like Urban Decay's Beached Bronzer.
1 Apply it by moving the brush from the area under the cheekbone (closer to the earlobe) to the corner of the mouth. But don't reach the lips; stop at a distance approximately equal to the thickness of two fingers.
2 To prevent the correction from looking too obvious, be sure to add bronzer to the areas where tanning usually appears most quickly: on the forehead along the hairline, temples, perimeter of the face, chin, middle of the nose.
The result will be natural and organic if you use a large natural brush with soft bristles - it distributes the product over the face as easily as possible.
How to highlight cheekbones with shadows and powder
If you don’t have any blush, corrector, or bronzer on hand, and you urgently need “perfect cheekbones,” take brown eye shadow and face powder. Look for shades with a matte texture and cool undertones—greenish-brown, grayish, and a little dusty, like Club Crawl from NYX Professional Makeup's Hot Singles collection.
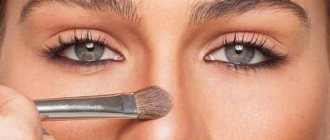
1 First, apply foundation, then go over it with face powder - this way the shadows will not stain the tone and will be easier to shade. Using a fluffy natural brush, apply the brown shade under your cheekbones. Try not to apply too much product or press too hard on the brush. Softly blend the borders.
2 Then take a powder brush and brush a powder that matches your skin color over the “shadow” to further blur the lines of the correction.
This method is the most intense of all due to the high pigmentation of the shadows. With this correction you can literally draw new facial features. In photographs and videos, everything will look very realistic, but in makeup for life there is a chance of overdoing it, so be careful and don’t get carried away.
Full sculpting
The most common method among both professional makeup artists and amateurs is the use of specialized correctors.
Dry correctors need to be distributed over powdered skin, then they shade better and look more natural. Cream ones, on the contrary, apply on top of foundation, and powder at the end of makeup.
1 Cream corrector can be immediately applied over the foundation using a round artificial brush using soft tapping movements. To simplify the process, it is convenient to apply strips in the desired areas - under the cheekbone, in the temporal cavity, and also along the wings of the nose (if you require such a correction). Cream correctors include, for example, Superstay from Maybelline New York.
2 Then use circular movements of the brush to blend the borders.
3 Examine your face in reflection from all sides (preferably in natural light) and make sure that there are no clear lines left anywhere. This method of correction does not look too obvious, but at the same time noticeably emphasizes the cheekbones and makes the face more sculpted.
For more detailed instructions, see our video.
Cosmetics for highlighting cheekbones
There are an impressive number of means with which you can highlight your cheekbones. Usually they are emphasized with the help of dark correctors of various textures: there are dry correctors and creamy, softer ones. A natural shadow around the cheekbones works especially well when using bronzer; it gives the face a slight glowing tan. Girls often use blush, eye shadow and other cosmetics for this purpose.
Gymnastics to get rid of cheeks and make cheekbones
Sometimes cheeks appear plump due to the special position of the cheekbones, and here gymnastics will not help much. In other cases, face building for cheekbones can work wonders. With the help of face building, you can visually make your face narrower, fuller, with cheekbones, or vice versa.
Expert opinion Svirid Nadezhda Yurievna Cosmetologist, 5 years of experience
I talked more about the benefits and effectiveness of facial gymnastics in the article Facebook building - briefly and most effective
It is very important to perform all the exercises correctly, otherwise there is a chance of aggravating the condition or stretching the skin on the face. It’s good if, before doing independent gymnastics, you have the opportunity to learn from a master who knows anatomy well and can hone your movements
So, first of all you need:
Prepare for the procedure
It is very important that all your movements are correct, so carefully study the theory before you start practicing. It is better to do the exercises the first time, constantly focusing on a “cheat sheet” - a book or video lesson. Wash your hands thoroughly with soap. Clear your face of cosmetics
Using a gel or milk cleanser, thoroughly cleanse the skin. You can apply the scrub to your face and massage for a few minutes. Wash your face with warm water. Prepare a mirror. Make sure that the lighting in the room where you will do facial exercises is well lit.
Basic and most popular exercises for cheekbones:
Move your chair as close to the wall as possible. Sit down and lean your back against it. Your head should be in an elevated position parallel to the floor. Smile as wide as possible without exposing your teeth. Place your middle fingers on your upper cheeks and pull them up. Freeze in this position for 2-3 minutes. You will feel tension, this is normal. Then relax, wait 1 minute and repeat the exercise. There should be 3 approaches in total. Perform this procedure 2 times a day. This way you can make your cheekbones more expressive.
Open your mouth, forming an oval. Place the index fingers of both hands on your cheeks, inside your mouth. Try moving your fingers towards each other by squeezing your cheeks on both sides. Direct the effort specifically to the muscles of the cheeks, not the mouth, otherwise the exercise will not make sense. When you tense your muscles, immediately relax them. Repeat these movements for about 3 minutes. Relax by exhaling air through closed lips.
Open your anatomy textbook and find your zygomatic muscle. It runs diagonally on both sides of the cheeks. Open your mouth, forming an oval with your mouth. Try to tense and then relax the zygomatic muscle in this position. To make it easier, pronounce the sound “O” on each approach. Do this exercise for about 3 minutes.
Remember that exercises need to be done every day to achieve good results. Even a plastic surgeon cannot make a girl’s cheekbones in 1 day (no one has canceled post-operative swelling). Gymnastics for the cheekbones will work wonders, but not right away. Start practicing and in 1-2 months you will see how your face has changed.
Expert opinion Svirid Nadezhda Yurievna Cosmetologist, 5 years of experience
A more detailed set of exercises for girls and men is discussed in the article How to pump up the cheekbones on your face - exercises at home
Men have a slightly different facial structure than girls: the stronger sex has a larger skull, thicker skin, pronounced cheekbones, and more massive facial muscles. Few men will need face building to lose weight on their face. But if such a need nevertheless arises, guys need to perform the exercises with more effort, and also increase the number of approaches by about 2 times.
Appearance modeling technique: basic principles
Facial sculpting is a complex, highly artistic procedure that requires accuracy and diligence. The consequences of haste, lack of taste, and negligence instantly become noticeable, and the appearance takes on an unnatural appearance.
Face sculptor (how to apply and the basic principles of shading depend on the chosen modeling technique) includes cosmetics of different shades. Their combined use allows you to create subtle color transitions, striking contrasts, and other aesthetic effects.
The main rule of professional contouring is careful shading. For everyday life, soft, smooth and barely noticeable shade transitions are appropriate.
For an evening out you can use:
- stark contrasts;
- color expression;
- catchy accents;
- color gradation.
To achieve the most natural look, corrective makeup should be applied in daylight. The method, technique of aesthetic correction, and a suitable set of cosmetics are chosen in accordance with the type of your own face.
Its contours are a decisive factor on which the sequence of your makeup actions depends. You can outline your reflection in the mirror with lipstick. Having seen what geometric figure it resembles, it will not be difficult to plan further steps.
Where does facial fat come from?
There are many reasons. Listed below are some of the main causes of facial fat.
Hydration retention: If you drink little water, your body will retain this fluid in the future. Obviously, your face will look fat.
Lack of sleep: Lack of sleep and stress are not only bad for your brain function, but also for your face. Sleep disturbances and stress can make your skin more elastic. This is why the skin begins to sag.
Obesity: Obesity creates extra fat on the face. Therefore, to get rid of facial fat, you need to overcome obesity.
Side effects: Side effects caused by the use of certain steroid medications can also lead to facial fat.
Genetics: Genetics is also one of the culprits behind the presence of facial fat. If this is the reason, then you must follow a strict diet to get a perfect face.
Choosing a corrective composition
You need to select a corrector for each girl individually. Just because a particular remedy works for someone doesn’t mean it will necessarily work for you.
First of all, pay attention to your skin type. This is one of the most important criteria for determining the appropriate texture of the product.
If in the areas that will be corrected the skin is not smooth, there are inflamed areas, acne marks or fresh rashes, then this is the case when dry corrective compositions are ideal. Wax products will not lie smoothly on raised areas and can only emphasize the presence of imperfections. Therefore, give preference to dry textures, apply them on top of powder, with light movements, when the makeup is already completed. Fat correction is more suitable for processing before photo or video shooting.
Massage and skin care
Massage helps stimulate microcirculation of blood in tissues and make the oval of the face more refined and aesthetically attractive. It is carried out along special lines with soft stroking movements and light tapping with the pads of the fingers.
The surface of the face needs not only cleansing, but also moisturizing, nourishing and protecting. Firming masks for oily skin on the cheeks can be prepared from:
- kefir and kaolin (white clay) - 2 tbsp. spoons of powder per 75 ml of liquid;
- egg white and 2 tbsp. spoons of black clay.
For dry or thin sensitive skin of the cheeks, a mixture of warm oatmeal with milk (3 tablespoons) and one yolk is suitable.
Apply the mixture onto cleansed skin with massaging movements, and after 15-20 minutes, rinse off the remainder with warm green tea or water at a comfortable temperature.
The effectiveness of facial exercises is increased by massage sessions.
It has the following effects on the face:
- relaxes facial muscles;
- removes excess liquid;
- lifts cheekbones;
- models the oval of the face.
How to make cheekbones on your face using special massage movements that complement the exercises:
- The face cleansed after exercise is covered with base oil (olive, sesame, apricot, jojoba).
- The skin is warmed up in a circular motion, moving along the massage lines.
- At the first stage of the massage, the cheekbone line is raised. The index, middle and ring fingers are placed to the middle of the chin. Pressing, outline the lips and rise to the inner corners of the eyes. Stop the movement at this point for a few seconds and, without ceasing to press, spread your arms in the direction of your temples, and then return to the starting point.
- To strengthen the zygomatic major muscle, place your palms on your cheeks, touching the wings of your nose with your fingertips. By pressing your fingers on the skin, they are moved to the temples and lowered along the neck to the collarbones.
- To smooth out the muscles of the cheekbones, you need to connect the tips of three fingers in the center of the chin and forcefully point them towards the tips of the ears. To the starting point through the lateral lines of the cheekbones.
Important! You should not massage your cheekbones in the following cases:
- poor physical health;
- skin rashes;
- disturbances in the functioning of the facial nerve.
How to highlight cheekbones on a round face if there are none
For chubby girls, the issue of highlighting and visually narrowing the face is especially relevant. Therefore, we will tell them how to apply makeup correctly.
To do this, in addition to foundation, concealer, blush and powder, you will need a bronzer with a little shimmer.
Armed with the necessary tools, we proceed to makeup.
- We wash our face and cleanse our face with tonic if the skin is oily.
- Apply day cream and let it absorb.
- Apply foundation and concealer to your face. These two products can make it smooth, even and hide all inflammation, freckles, age spots and other imperfections.
- Now you can apply the bronzer. It is selected a tone darker than the skin and applied just below the cheekbone line.
- Using a soft brush, apply blush from bottom to top and blend.
Set of exercises
Gymnastics helps to tighten the central part of the face, cheeks and cheekbones, smoothes out nasolabial folds. This is an excellent prevention of aging of the lower oval zone. Each technique is repeated from 8 to 15 times; tension is followed by relaxation.
Exercises:
- Allows you to tighten the paired muscles of the cheeks, which are located from the corners of the mouth, parallel to the lower jaw. It is their strengthening that helps to get rid of jowls and visually look younger. Lower your lower jaw, stretch your lips into the letter “O”. Place your index fingers in the mouth above the lower rows of teeth. Squeeze your cheeks against the resistance of your fingers. The wrong way to do this is to move your lips, only your cheeks work.
- Take air into your mouth, filling your cheeks, and exhale. This technique helps relieve stress and improve charging efficiency.
- Effective for strengthening the zygomatic minor muscles. The starting position, as in the first exercise, is to open your mouth, lower your lower jaw, and stretch your lips into the letter “O”. Place your index fingers in the oral cavity in the area of the upper lip and row of teeth. Squeeze and unclench the muscles of the corners of the mouth, overcoming the resistance of the fingers, while the lower jaw is relaxed.
- To relax, take air into your mouth, puffing out the upper lip area, and exhale.
- A technique for working the large zygomatic muscles located from the corners of the mouth to the temporal cavity. This allows you to tighten your face frame and form sculpted apples of your cheekbones. Extend your mouth into an oval as in previous exercises. Pull up the lower eyelid, but do not close your eyes. The forehead and lower jaw should be relaxed. To make it easier, you can pronounce the short sound “O”.
Types of brushes for sculpting makeup
- semicircular flat, designed for uniform application of cosmetics;
- with a beveled cut, used for point modeling of the wings of the nose and cheekbones;
- dome-shaped, well distributing powder and other powdery compositions, effectively smoothing out transitions;
- with a heel-shaped working part, used to treat large areas of the face - forehead, chin, cheekbones;
- sponge - a pillow-shaped brush with a pointed end, used for applying corrective cosmetics and shading.
It is important to create your own color palette, ideally suited to the natural color type of appearance. Cosmetics with reflective inclusions look incredibly impressive. They allow you to create current and fashionable makeup.
How to pump up your cheeks. Exercises for the ideal shape of cheeks and cheekbones
Unfortunately, very few women consider their appearance to be perfect. In fact, you can always find some defects and errors. They become especially noticeable with age, when the skin loses its elasticity. The first wrinkles appear at the mouth and eyes, cheekbones become less pronounced, and the outlines of sagging cheeks and a double chin appear. In this difficult task, you will need faithful helpers, and exercises for the cheeks and cheekbones are one of them.
Is there really nothing that can be done other than applying a ton of makeup and undergoing expensive salon procedures? How to remove cheeks and pump up the cheekbones of your face? There is one great way. Home gymnastics for cheeks, cheekbones, double chin reduction - something that can help you. In this article you will find many simple but effective exercises, learn how to correctly correct your face and be able to watch interesting and very useful
A set of exercises for cheekbones
How to achieve beautiful and flawless cheekbones, like the models on the covers of glossy magazines? It’s very simple – you just need to pump them up! It is in our power to make them more expressive, clearer, to highlight impeccability and perfection. To do this, you just need to devote 10 minutes every morning and evening to exercises for the cheekbones.
- Tilt your head back until you notice a clear feeling of tension in your neck muscles and try to extend your jaw as much as possible. Freeze for a few seconds, then you can return to your previous position. Repeat at least 30 times.
- Next, almost the same exercise, only in a different sequence - first we move the jaw, then we throw back our head. Otherwise everything is the same.
- Move your jaw to the right side while turning your head towards your shoulder. Then in the other direction. At least 30 repetitions are recommended.
- Now you need to do an exercise that will help not only highlight your cheekbones, but also remove wrinkles around your mouth. Pull your lips together as if you are about to kiss someone. Now tighten them and begin to perform circular movements, first in one direction, then in the other direction. 20 repetitions will be enough.
- The last exercise is universal - with its help you can pump up your cheekbones, reduce the expression of your chin, get rid of sagging cheeks, remove wrinkles around the mouth and smooth out nasolabial folds. Take a very ordinary pen. The heavier it is, the better. Place it on your upper lip and, using the force of your facial muscles, press it into the nasolabial fold. How to pump up your cheekbones? You just need to hold the object for at least 3 minutes.
What problems does black-and-white correction of the facial zone solve?
- giving the appearance expressiveness;
- creating contrasting accents;
- change in the contours of the chin, cheekbones, nose;
- masking anatomical defects and aesthetic errors;
- visual rejuvenation and refreshment of the image.
Make-up using sculpting products is suitable for all girls without exception. It is appropriate for everyday life, business style, and evening trends. There are no age restrictions on heavy multi-layer makeup.
Both young girls and mature women use means of visual and aesthetic correction of appearance with equal success. A facial sculptor is not a specific cosmetic product, but a set of techniques, methods and tools for changing appearance. It can be described as an everyday analogue of theatrical or cinematic makeup.
Safety regulations
Facial gymnastics requires the implementation of certain recommendations. By following safety precautions, you can achieve a quick effect of creating cheekbones and tightening your cheeks.
Precautionary measures:
it is important to monitor your posture and head position; you must not lean forward, otherwise the gymnastics will be ineffective; choose good lighting, there should be no glare or shadows reflected on the face in order to monitor the correct execution; during the exercise, one area of the face is worked, the others should be relaxed, you can fix them with your fingers and palms; every tension should be replaced by complete relaxation; you should not overstrain the muscle fibers, this can lead to sprains; It is worth increasing the load gradually, but regularly, it is recommended to start with 3 repetitions, after 2-3 months reach the maximum 15.
Contraindications:
- hypertension;
- pathology of the facial nerve;
- acute viral and infectious diseases;
- undergone plastic surgery, thread lifting within 2 years.
You should also postpone classes if you have recently undergone hardware lifting procedures or administered youth injections.
It is possible to form beautiful cheekbones and tighten the oval line thanks to effective gymnastics. Not only will the muscle frame be strengthened, but the overall condition of the skin will noticeably improve. It’s easy to maintain freshness and youth at home using the secrets of Facebook building.
What you need for makeup
To create perfect facial contouring at home, you need a palette that includes several shades of foundation - highlighters and bronzers. Almost all well-known manufacturers produce sculpting products (MAC, Maybelline, NYX and others). The more shades a palette contains, the easier it is to match your skin tone. After all, its natural tone changes significantly depending on the time of year.
In addition to contours, you will need additional cosmetic products that are used to create a base for makeup and as a fixer.
To even out the tone you will need:
- primer – ensures smooth application of subsequent layers of cosmetics;
- tone – evens out skin tone;
- concealer – essential for masking dark circles and redness;
- powder – evens out and consolidates the result.
Required products for contouring:
- highlighter is a product with reflective particles, slightly lighter than the natural skin tone, its task is to highlight and refresh the face. The product contains shimmer;
- bronzer (contour) – this product is designed to highlight the cheekbone line. This product darkens everything that goes beyond the ideal shape - oval. It should be two shades darker than your skin tone;
- blush – adds freshness to the overall look.
In addition, you will need tools to apply and shade contouring:
- wide brush for applying foundation;
- an angled fluffy brush for applying contour and blush;
- a kabuki brush with a flat cut - for creamy textures, with an oval cut - for dry products;
- fan brush – for applying highlighter in a light layer;
- an eyeshadow brush with a rounded tip - can be useful for precise shading.
The list of what you need for facial contouring is complemented by a regular sponge or beauty blender. It is ideal for applying creamy textures.
A base for sculpting correctors is required. Without it, makeup will quickly turn pale and crumble. And with a primer, cosmetics look more intense.
It is important to know how to choose cream correctors for facial contouring. These products come in two types:
- fixed;
- waxy.
Fixed cosmetics are especially durable. They don’t even need to be covered with powder on top. Products contain a lot of pigment and dry quickly, so they should be blended as quickly as possible. This is what you need for facial contouring performed for important events and photo shoots. Moreover, it is better to entrust the application of sculpts to a professional makeup artist. Makeup made using fixing contours lasts a long time until it is removed with makeup remover products.
Wax cosmetics have a plastic texture and are often enclosed in sticks. This product is practical because it is convenient to use cosmetics in sticks. No brushes or sponges are needed to apply it. The cosmetics are applied directly from the tube and can be blended with your fingers. If you fix the wax coating with powder, then in terms of durability it is not much inferior to makeup made with the help of fixing correctors.
Surgical correction of the cheeks – is it worth doing?
It would seem that a person is a unique and complex system, thought out to the smallest detail, and every particle in this system is simply irreplaceable. However, many people live their long and happy lives perfectly without an appendix, tonsils or Bisha's lumps. But if the removal of the first two organs is carried out due to the possible risk of developing pathological processes in the future, then getting rid of fat deposits on the face pursues purely aesthetic goals and has unfavorable long-term consequences.
The reason for the numerous appeals of women to plastic surgeons is the fashion for sunken cheeks and pronounced cheekbones. Looking at the photoshopped beauties on the pages of fashion magazines, “ordinary” women sigh languidly and dream of looking exactly the same. By the way, many stars and fashion models also found themselves on the surgical table at one time in pursuit of the ideal.
Bisha's lumps play a very important role in the infancy of every person. Imagine a child with sunken cheeks. The first thought that comes to everyone’s mind is that he is probably unwell. Up to about 5 years of age, fat deposits act as shock absorbers, reducing pressure on the jaw muscles as the body grows. With their help, the baby learns first to suck and then to chew. With age, the need for Bish's lumps disappears, and they gradually decrease. Therefore, there is an opinion that cheekbones appear with age. But, of course, the lumps don't disappear forever, otherwise we'd all look like characters from Tim Burton cartoons.
Today, such a popular operation in the recent past to remove Bisha's lumps is considered ridiculous and unnecessary by many progressive surgeons. Before you get indignant, remember the history of beauty: once upon a time, ladies, in order to become more attractive in the eyes of men, used mercury white, dropped belladonna into their eyes, infection with tapeworms or worms was considered a good remedy for losing weight, and almost all diseases were treated with bloodletting.
In fact, after such a radical surgical intervention, the face visually changes in about 15-20 girls out of 100 - precisely in those whose volume of fatty tissue was actually hypertrophied and exceeds the normal amount. For the rest, the so-called placebo effect works - there is no result, but the complexes are gone, because “I made up my mind, I am now a beauty!”
No truly good plastic surgeon will suggest that you just go ahead and mindlessly get rid of fatty deposits on your cheeks. This is the same stupidity as removing the 8th or 7th teeth to highlight the cheekbones. The fact is that already 6-7 years after the operation, unnatural and clearly unaesthetic wrinkles will begin to appear right in the middle of the cheek. The Bisha lump intended by nature (and for good reason) is not there, which means that the body strives to fill this void itself, tightening the skin like a funnel. This phenomenon is also called “grandmother’s failure.” Are your cheeks sunken? Either you are missing some teeth, or you got a “good” surgeon.
If a lady still definitely wants to get rid of her cheeks, or nature has distributed the fat on her face asymmetrically, the correct action of the doctor on the operating table is to carefully redistribute the tissue or remove a small part of it.
What do stars do who manage to achieve the effect of sunken cheeks, but without terrible failures? The answer is very simple. They place the thinnest silicone threads under their skin, which, when stretched, slightly reduce the size of the cheeks and lift the corners of the lips. The effect after such a mini-operation lasts about 5 years, and after the thread you can tighten it again.
Cosmetics set: what you need to highlight your cheekbones
To create the perfect makeup, you need several cosmetics.
- Blush. Based on consistency, they are divided into liquid and dry. The latter are more stable and last longer. Liquid or cream apply better and look more vibrant. If you want to shine all day, then give preference to crumbly textures.
- Powder. Its tone should be slightly darker than the one you use for your face every day. For normal to oily skin, dry powder is suitable, while for dry skin it is better to use cream powder. However, it often contains harmful substances: parabens or silicone. A mineral-based product can be an excellent alternative. It takes good care of the skin, evenly distributed over the entire surface. This powder is made only from natural ingredients, so it does not cause allergies.
- Primer is the base for makeup. It evens out the skin and hides imperfections.
- Tassels. There may be two or three. The first is needed for applying blush or other cosmetics to the cheekbones, and the second is necessary for shading. For makeup, use a wide brush, about 4 cm, and the brush for shading should have even bristles. Choose brushes made from natural materials; the best option is squirrel hair.
In addition to the products listed, you will need a bronzer and a concealer.
How to remove cheeks in 1 day: destroying myths
There are thousands of articles on the Internet, the authors of which promise readers the ideal shape of cheeks literally out of thin air. Their headlines are false and are aimed primarily at clickbait - an attempt to lure a user to the site with false information in order to view advertising. Therefore, we decided to collect some of the most popular myths and dispel them.
Myth No. 1. Cheek reduction period – from 1 day
In one day you can remove your cheeks only in Photoshop or on the table of a plastic surgeon. No diet (miracle cream, exercise or anything else) will break down subcutaneous fat and remove it from the body in such a short period of time. A week is a realistic period for those who have a surplus of a couple of millimeters. In other cases, the fight against really thick cheeks takes from a month to several years.
Myth No. 2. Thanks to the “N” product, big cheeks will go away forever
Advertised creams and dietary supplements provide only a short-term effect (and not always). By taking them, you do not eliminate the cause of the accumulation of subcutaneous fat, but only temporarily neutralize its consequences in the form of plump cheeks. This means that as soon as you stop taking pills or making cosmetic masks, your face will become even more rounded than it was before. To avoid this, you need to fight not the consequence (thick cheeks), but the root cause (excess weight, excess fluid in the body, etc.). This way you will keep not only your wallet intact, but also your health.
Myth No. 3. Smiling contributes to the appearance of wrinkles
If you don’t do callanetics, gymnastics or any other exercise while losing weight, the skin in problem areas quickly becomes flabby and sagging. However, most of these sets of exercises ignore facial muscles, which also need full load. By smiling, you force your facial muscles to work and tighten them. Moreover, a smile makes the face more open and attractive, turning massive cheeks into neat, plump cheeks. Therefore, smile more often!
Highlighter selection
Sculpting the face (the photos show step by step not only the effect of shadow, but also light) is impossible without a highlighter. Thanks to it, it is possible to highlight certain areas to give them volume and a delicate glow.
Highlighters differ in texture:
- The liquid highlighter has a water-like texture. It is recommended for use by beginners who are just mastering the contouring technique. Thanks to its light texture, you can't overdo it with this product and it's easy to layer. The liquid product creates the most natural and delicate effect.
- Creamy texture is the most versatile. It is suitable for any skin type. This highlighter is not difficult to blend. To achieve the desired effect, a pea-sized amount of product is enough.
- The sticks have a viscous and rich creamy texture. They are most convenient to apply due to the packaging format. In addition, sticks are most often used when it is necessary to frequently transport highlighter. However, they are contraindicated for oily skin due to the risk of clogging pores.
- Dry and crumbly highlighters have a powder-like texture. They are convenient to use on oily skin, which tends to quickly absorb other textures. This product can only be applied with a brush.
When choosing a highlighter, you need to decide on the color and size of the shining particles. The shade of the product can be silver, golden or pinkish. Radiant particles are small and unnoticeable, which is necessary to create the effect of natural illumination of the skin from the inside. There are also highlighters with large sparkles, each of which is noticeable individually.
Botulinum toxin
Preparations containing this substance are widely used in cosmetology. The principle of their action is that botulinum toxin is injected, after which this protein prevents the transmission of nerve impulses to the muscles from the nerve endings. Due to this, the number of muscle contractions is significantly reduced. In cosmetology, products such as Botox, Relatox, Xeomin, and Dysport are more often used.
In the case of how to get rid of chubby cheeks with the help of these drugs, they do not always help. Their use is advisable only if the cause of this phenomenon is hyperactivity of the masticatory muscles. The products act specifically on them, causing relaxation. However, their activities are not completely blocked.
It only takes a few days for the drug to start working and for the patient to see results.
But it is very important to find a competent specialist who will perform the injection.
How to choose contouring products based on your skin type
Those who are just starting to use contouring are interested in which contouring is better - powder or cream. Powder products, as noted above, are easier to shade, while cream products create a denser coverage. But this is not the only thing you need to be guided by when choosing proofreaders. Be sure to take into account your skin type.
For oily skin, choose dry contouring. Such sculpting products are available in loose or compressed versions. They mask oily shine and last longer as they literally get into the pores. It is important to choose a highlighter without shimmer, matte or satin, as glitter looks like greasy glitter. The shade must be matched to your skin tone.
Dry facial contouring products come in different colors:
- golden;
- transparent (with shimmer);
- whitish;
- pink;
- colored.
Note! For owners of fair skin, contours of a cold range are suitable, for those with dark and tanned skin - golden ones.
Cream contour products have moisturizing properties. Cosmetics with a light texture do not highlight flaking, while dense cream products, on the contrary, highlight them.
It is recommended to choose a contour with caring components - oils and vitamins. They are mostly intended for those with dry skin, but there are products with a matte finish that can be applied to oily skin.
Important! Makeup contouring using cream correctors begins with the eyes and eyebrows, so that crumbling mascara or shadows do not spoil the coating.
Makeup and hairstyle, correcting cheeks
A well-chosen hairstyle and applied makeup can work wonders on your appearance.
With the help of makeup, you can not only give yourself individuality, but also correct existing flaws.
When giving your face the right contour using cosmetics, you need to consider the following:
- This is not a panacea for excess weight and strained muscles. You can’t remove full cheeks in just one day, even with the help of cosmetics, no matter how hard you try.
- It is necessary to correct the contours of the face correctly, otherwise you can only aggravate the situation.
- Corrective products should not look like a mask on your face.
Your cosmetic bag should contain correctors of different shades, powder and blush. Typically, large cheeks are darkened with a dark color and highlighted with blush. To do this, draw a line from the middle of the cheeks to the eyelids and shade it well. Blush is applied under the cheekbones. This approach can visually reduce the face.
As for a hairstyle that can hide swelling, it all depends on the initial image. For those with thick, long hair, straightening is a good option. Straight hanging hair elongates the face and hides its volume. A low-tied ponytail has the same effect.
A long bob haircut just below the cheekbones also works well. A cascade haircut would also work. When choosing hair color, you should not resort to bright colors. If you want variety, you can do highlighting.
In pursuit of changing your appearance, the main thing is to know a sense of proportion.
No matter how much you want and no matter what cosmetologists promise, you cannot get rid of sagging and large cheeks in 1 day. A changed lifestyle and an integrated approach are the main allies in solving the problem at hand.
Square
For girls with a square face, the sculpting product should be applied to the side areas of the forehead. This trick will help make your face narrower. Don’t forget to properly highlight your cheekbones with makeup; blend them thoroughly, moving from your earlobes to the middle of your cheeks. For girls with a square face, highlighter is applied to the area under the eyes (a little closer to the nose) and to the middle of the chin.
Secrets to disguising chubby cheeks
If you have to go out urgently, then the right make-up will help eliminate the expressionlessness of your cheekbones and swelling of your cheeks. Prepare an angled brush and powder of two shades - light and dark (the difference between them should not be more than 1-2 tones).
Feel the cheekbone - a bone located slightly below the temporal part. Makeup that removes cheeks on the face is performed as follows:
- Apply a dark shade of powder below the cheekbones, moving from the temple to the center of the face.
- “Brighten” the surface of the cheekbone itself with powder that matches your skin tone.
- To avoid highlighting the boundaries of the shades, blend the powder, making smooth transitions.
- Also powder your chin and nose with a light shade to make your cheekbones look more prominent and your face to look thin and attractive.
Important tips for girls
We bring to your attention all the most basic nuances that will help you create the ideal complexion tone, lighten and darken it in the places where it is needed.
- Remember to use matte textures for sculpting. This is especially true for highlighting the cheekbones. Everything that requires darkening is done with matte products. For those areas that need to be brightened, various shining products are usually used. Simply put, your highlighter should shine.
- A regular cosmetic sponge will help you achieve perfect blending of the product. Shading with a sponge is done with soft circular movements. For an amazing effect, try moistening the sponge a little with plain water or using a moisturizer: this will give you a more even coverage.
- Everything in makeup should be set with regular powder. Choose the best one for yourself. After finishing your makeup, be sure to set the tone and cosmetics on your face with powder. This will make your makeup last longer and help get rid of all the excess contouring.
- To find out which shade of contouring product is right for you, lightly press on your cheek with your finger. In the resulting hole you will see the color of your face's natural shadow. This is exactly what a contouring product should be in your everyday makeup bag.
Exercises against double chin
The appearance of a double chin makes most women despondent, because everyone wants to wear jewelry on a neat and beautiful neck. Facebook building will help in this situation too. Removing unsightly double chin folds is quite simple. How to do this with exercise?
- First, watch your posture. The back is straight, the chin is parallel to the floor.
- Fold the scarf lengthwise and wrap it around your face. Now the exercise itself - begin to slightly pull the fabric upward.
- At the same time, you need to provide maximum resistance with your chin. It would seem that there is nothing special about this exercise, but during its implementation, exactly those muscles that are needed to reduce a double chin work.
In this article you found exercises for slimming your cheeks, highlighting your cheekbones and getting rid of a double chin. They will definitely help you prolong your youth and always be on top. In conclusion, we invite you to watch another extremely useful video from Galina Dubinina. Follow the advice of professionals and always learn from the best, then your beauty will only be in your hands.
Features of sculpting with cream and dry products
When doing makeup, take into account whether contouring is done with a dry product or a cream one. Dry textures are recommended for beginners. Contouring with dry products is easier, they are easier to shade. Powder correctors from Givenchy, Dior or Maybelline have received good reviews. Brushes with both natural and synthetic bristles are suitable for shading. Products are blended immediately after application. And before applying cosmetics, the skin must be moisturized.
Important! Dry products are applied after cream products. Moreover, the foundation must be powdered first so that the dry corrector does not form into a dense, undetectable spot.
Creamy textures are applied in a thicker layer and need to be shaded more thoroughly. The skin on which cream contouring is applied not only does not dry out, but is also moisturized.
Products are often used in sticks. Sticks from Korean manufacturers, such as Tony Moly, and European ones, such as Clinique, are especially recommended.
If the product is purchased in palettes, it is applied with a brush with natural bristles. Shading is carried out after applying bronzer and highlighter. First, begin to blend out the highlighter, gradually connecting it to the contour. If you don't have a suitable brush, you can do the procedure with your fingers.
Note! The scheme for applying contour products does not depend on their type, but is determined by the shape of the face. Before contouring, you should identify those areas from which you want to divert attention.
Sculpting an oval face
For such girls, vertical proportions prevail over horizontal ones. The oval shape of a woman's face is given by the combination of a high forehead with an elongated chin.
Corrective manipulations should be aimed at symmetrical toning of the hairline and the lower border of the jaw.
Light or pastel blush highlights the cheeks.
They should be shaded horizontally
You can visually widen your chin with a light-colored sculptor.
An expressive accent is made with bright makeup on the lips.
If you apply a dark concealer to your temples, the top part will appear narrow, which will balance out the bottom part.
Choose a quality product
Speaking about the quality of the product, it is worth mentioning several factors:
- Firstly , it should have a pleasant texture that will be easily transferred from the packaging to the skin, and just as easy to shade. The highlighter should under no circumstances have large sparkles.
- Secondly , the product must be a trusted brand. Do not order cosmetics from Aliexpress, even if you see there a seductive palette of MAC correctors, which the original manufacturer does not know about.
- Thirdly , pay attention to the shade of the product. This is very important, especially for those products that you use to darken the necessary areas. Make sure that they do not have a reddish tint when applied to the skin, otherwise your entire makeup will look unnatural and comical. They should be a cool brown or taupe shade. As for the highlighter, it should also match your skin tone. However, in this case, everything is much simpler: champagne highlighter is practically a universal shade. Blush should not have a peach undertone, since such blush does not occur on the cheeks in nature.
Pay special attention to shading
Make sure that the shading of all products applied to the face is thorough; no clear lines should remain. Whatever you apply, blend the line first along the edges into a light haze, and then the line itself in the middle.
It is important that the pigment in the center of the line is brighter than at its edges. This way you will correctly place the light and shadow accents.
Sculpting a triangular face
The main task is to hide protruding areas and highlight unclear contours. To do this, they are covered with sculptural cosmetics of a rich shade and carefully shaded with a sponge. The pointed shape of the chin is smoothed by darkening its central part and lightening the side surfaces.
It is better to use cosmetics with a creamy consistency
The dark tone is applied in a diamond pattern and thoroughly smeared until completely absorbed into the skin. An expressive emphasis on eyelashes and eyebrows will draw the focus of attention, making the oval even more symmetrical and attractive.
How does correction differ from sculpting?
In general, the terms correction and sculpting are called synonyms, but they have certain differences. Correction is more about creating light and shade on the face or darkening certain areas to change the shape of the face. This is relevant if you need to visually shorten your nose or narrow your face, etc.
Sculpting also includes similar actions, but it is done more often in order to visually emphasize the natural lines on the face and make them clearer. This technique became popular back in the 70s of the last century.
Use correctors in dark and light shades to highlight the best features on your face, as well as to retouch imperfections. With the help of light tones you can reflect light and highlight something, while dark correctors help, on the contrary, to hide and shade. This way you can change the oval of your face and retouch its features. However, this technique is not easy, so it takes time and practice to master it.
Rating of the best facial sculptors
The contouring procedure requires the availability of high-quality means of aesthetic correction of appearance. The modern beauty industry offers a wide range of cosmetic products.
Top 5 best facial sculptors
- Travel Contour Kit Smashbox - Powder. Sculpting kit, which is a powdery mixture of 3 shades: neutral, cool, warm. The compact palette fits easily into a woman's purse. The only negative is the lack of a brush in the kit. Cost 1600 rubles
- NYX Cream Pro - Cream. A palette of highlighters and quick contouring products. The cosmetic product combines matte and sparkling textures. The former eliminates oily shine, the latter creates an expressive accent. The set is designed for evening makeup. Cost 1550 rubles
- Lumene Instant Glow Bronzer - Liquid. The product is easily absorbed into the skin of the face, darkening it naturally. Cleanses the epidermis and has an antibacterial effect. Cost 900 rubles
- Soda Stik - Viscous substance. Gives the skin a bright radiance and healthy glow. Contains microscopic sparkling inclusions. The product is intended for holiday makeup. Cost 500 rubles
- Wonder Stick, NYX Professional Makeup - Thick cream. Universal stick with a light cream shaft. Suitable for lightening dark skin and bronzing milky white skin. It can be used to draw fine lines accurately. Cost 900 rubles
With any of these means or their analogues, fashionistas transform facial features beyond recognition, hide aesthetic flaws and anatomical errors of the skin.
Determine your actions
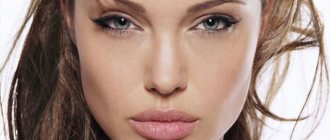
First of all, it is important to distinguish the cheekbones themselves from the subzygomatic depressions. Cheekbones are the protruding part of the face, so the light falls on them to a greater extent. But the subzygomatic depressions are depressions that, as the name suggests, are located directly under the cheekbones. Accordingly, they are in the shade. So, in order to correct the cheekbones with makeup, you need to add highlights to them, and the sub-cheekbone depressions will need to be darkened, thereby enhancing the natural shadow.
If it seems to you that there are no cheekbones on your face at all, there is a method that can easily convince you of the opposite. Push your lips forward and then move them to the side in this position. This will make it easier for you to understand what you have to highlight and what you have to darken, so that everything looks natural and beautiful.