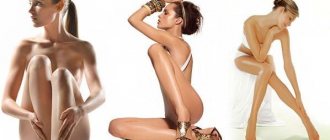
All girls want to look attractive, not only at any age, but at any time.
In addition, you want to change your style as often as possible in order to attract attention. Therefore, many girls are ready to experiment. Experimenting with your hair is probably the simplest and easiest way to change your appearance. You can make a square out of them without resorting to scissors or lengthen them without much difficulty. There is another way to change your hairstyle - curl your hair, this can also be done without much effort.
Iron for light waves
The curling iron can be used not only to straighten strands, but also to create a soft and natural wave.
- Comb your hair and separate a thin strand.
- We intercept it with an iron approximately in the middle.
- We wrap the strand around the straightener, turning it 360 degrees.
- Slowly lower it to the ends.
- We process the remaining hair and spray the hairstyle with hairspray.
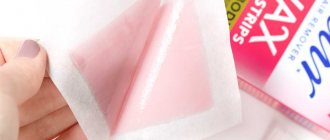
Rags
First, let's prepare homemade “curlers” from rags. Old and unnecessary nylon stockings or tights will do. They are cut into strips 2-4 centimeters wide. Each such segment must be pulled by the edges so that the fabric can curl.
Next, take a simple landscape sheet and cut it into rectangles, then wrap all these pieces around the prepared rags.
That's it, we've sorted out the curlers. It's time to start preparing your hair. Wash your hair and dry it (preferably with a towel), but leave your hair slightly damp before curling. Next, divide them into strands, trying to maintain the same thickness.
To wind your hair into rags, place the tip of the strand in the middle of the so-called bobbin. Holding the area just above the middle, curl the hair to the ends, then tie the edges of the cloth into a tight knot. It is recommended to wind each strand not clockwise, but counterclockwise.
After you have processed all the strands, tie a scarf on your head and do this for 3 to 5 hours (the number of hours depends on what result you need).
If you want to get wide and dense waves on your hair, then you should wind the strands thick. When the time is up, carefully remove your makeshift curlers, comb your curls with your fingers and lightly spray them with hairspray.
Hair sticks
Did the girl have special hair sticks? They can be used to create curls. How?
One method of using hair sticks has been presented above. In addition to this, you can do the following:
- Part your hair in half.
- Tie a ponytail on one side and then secure it with an elastic band.
- Take the hair from the other side of the parting.
- Wrap them around a hair stick.
- Pass the end of the stick through the base of the ponytail and the elastic band on the other side of the head.
- Carry out similar actions with the second tail.
- Secure the hair sticks so that they do not fall out. For example, by tying their ends with a small elastic band.
At this stage, active actions can be completed. The girl must be patient and wait until the night. Only after this is it suggested to loosen the curls and see how the hairstyle will look in the end.
Who most often has to do waves on their hair?
According to statistics, wave styling is the most popular hairstyle among those with straight hair. Girls with curly hair also often use this style to give shape to their natural curls. With outward simplicity, this styling gives gloss and charm to every girl.
The principle of creating waves on your hair is simple - shape and fix. To create curls, various devices are now used - traditional curlers, curling irons or hair straightening irons. On the one hand, there are no difficulties in using them, but, on the other hand, they have their own secrets and tricks.
Choose your version of side bangs from the photo, taking into account your hair type and face shape.
Watch how to weave a French braid with step-by-step instructions in video format here, with detailed descriptions and proven tips. This article has many tips and photos to understand how to weave a French braid step by step using various techniques.
It’s easy to get waves of a different shape if you know how to weave a spikelet, detailed instructions are waiting for you at this address https://ovolosah.com/parikmaher/kosi/uznajte-5-variantov-kak-zaplesti-kolosok-rebenku-i-samoj-sebe -a-poshagovaya-instruktsiya-c-foto-i-video-podojdet-takzhe-dlya-nachinayushhih.html
To secure the styling, there is a large arsenal of styling products.
Straightener + harnesses
- We comb our hair thoroughly.
- Selecting the thin part.
- We twist it into a tight rope.
- We clamp it with an iron and move the device from top to bottom. We do this very slowly so that the hair inside the bundle has time to fully warm up. You can walk several times - this will make the strands curl better. Important: the width of the ironing plates should not exceed 3 cm.
- Let the hair cool completely and only then release the plait.
- Repeat the process with the remaining hair.
Also, light curls can be made in this way:
Safety precautions when working with a hair straightening iron
To avoid injury when using a hair straightener, the following rules should be followed:
- do not touch the device with wet or damp hands;
- do not spray alcohol-containing substances near a hot device, for example, varnish;
- after finishing use, immediately unplug the device from the outlet;
- Make sure that the hot device does not fall into the hands of children;
- When styling with a hair straightener, make sure that the hot parts are not too close to your skin and do not burn it (the ears, cheekbones and cheeks, scalp, fingers are most often affected);
- When plugging the device into the socket, make sure that the plug is fully inserted into the socket;
- After using the device, do not place it on flammable surfaces and do not immediately put it away when it is hot.
If you follow these rules, using a hair straightener will only bring you benefits.
Curlers for beautiful waves
Velcro curlers are great for styling. In addition, they are very convenient to use, because they themselves cling to the hair. The main thing is to choose the right size, because the size of the curls depends entirely on the diameter of the curlers.
1. Wash your hair.
2. Comb and divide the still damp hair into several thin parts.
3. We wrap each strand with Velcro and dry it with a hairdryer or naturally. It is better to start from the top of the head, then move to the back of the head and finish with the side strands.
4. Let the hair cool and carefully remove.
5. Separate the curls with your fingers and secure with light-hold varnish.
If you wish, you can also take hot rollers, but you don’t need to abuse them - it harms your hair.
Immortal classic with curlers
Don't discount our mothers' #1 remedy. Fortunately, now you no longer need to sleep on hard cylinders.
What should you do?
- Use hot rollers, they significantly speed up the process and heat up in 5 minutes;
- For light waves, curlers of medium and large diameter are suitable;
- The heating temperature of some hot roller models exceeds 200 degrees, so thermal protection is mandatory, and ideally, styling with a thermal protection function;
- Before you start curling, your hair should be damp, but not wet;
- You need to keep the curlers on your head until they cool down - that is, about 15 minutes.
Recipe from SalonSecret experts for styling with hot rollers. Protective oil L'Oréal Professionnel Absolut Repair , a little Bouncy&Tender , medium hold varnish Infinium Pure Soft - and your waves will be very natural, well-structured and sparkling like a waterfall.
On a curling iron
First, let's look at the classic hair curling methods. There aren't that many of them. Let's start with the curling iron.
How to curl your hair with a curling iron? To achieve the desired result, it is recommended to do the following:
- Take one strand of hair.
- Curl the curl onto a preheated curling iron.
- Wait a minute. It is advisable to hold the device vertically. The final look of the hairstyle will depend on the angle of the curling iron.
- Unravel the curl and repeat similar steps with the rest of the hair.
Fast, simple and very convenient! But such a decision, as a rule, is not very welcome. A curling iron can damage your hair.
Using a curling iron to create waves
Some girls are afraid to use it for curling, but modern technology has long made it possible to create hairstyles without harm.
Use a good quality curling iron, with a ceramic coating and the ability to set a fairly high temperature. Curl your curls briefly, but at high temperature. This causes less damage to hair. Be sure to use thermal protection. Beautiful curls are obtained by using a large diameter curling iron and using wide strands.
The sequence of actions is as follows:
- Hair is washed and dried naturally or with a hairdryer with cold air.
- Divide your hair into 2 parts and pin the top one.
- Separate a strand, apply a little mousse to it and wrap it around a curling iron. Hold it vertically. Wait a minute and remove. Leave the strand to cool. So sequentially wind all the lower strands.
- Release the top part of the hair and curl in the same way.
- When all the strands are curled and cooled, you need to lower your head down, fluff your hair with your hands and sprinkle with hairspray for better fixation.
Video master class on creating waves using a cone curling iron
Waves with brushing and hairdryer
We recommend that those with manageable and not too coarse hair use this simple and easy method. It is suitable for both long and medium hair.
Step 1. Comb and divide your hair into separate strands.
Step 2. We wrap each one on a brush and dry it with a hairdryer.
Step 3. Remove the hair from the brush and spray the finished hairstyle with hairspray.
You can also use a diffuser. To do this, you need to first wash your hair, blot off excess moisture with a towel and dry each strand with a hairdryer with this attachment.
Hollywood wave for long hair
For owners of long hair, making a beautiful wave on your own is more difficult than with short curls, but turning to a hairdresser or asking a friend to help makes it much easier.
You will need: a curling iron, powder, a comb for combing, a comb, a comb for combing, varnish, a corrugated curling iron and enough time.
- Comb your hair and divide it into 3 parts.
- Separate the strands and separate each one, 2-3 cm in size, comb it at the roots and wind it onto a curling iron, then carefully remove it from the curling iron and, without unwinding, secure it with a bobby pin. Before winding, for rigidity, we recommend powdering it.
- Having gone through the back part first and then the sides, it is worth considering that the front part must be twisted only by stepping back from the roots and giving the desired shape; if you start twisting at the very roots, the crease will be visible.
- After going through all the hair, you should wait until all the strands cool down.
- Then, open each strand starting from the bottom one and lay them out.
- We lay out the strands at the back, using a comb to arrange them beautifully into a wave; if necessary, we help with wax.
- We process the front strands especially carefully to achieve the perfect wave.
- We inspect the finished hairstyle and eliminate inconsistencies in the waves.
Of the most important points, I would like to note the rules for applying powder and backcombing at the roots to add volume to the hairstyle as a whole.
A separate secret for readiness is to spray the bottom of the wave with varnish for elasticity.
Texturizing spray
Apply to dry hair. Such curls can be seen after swimming. Laying occurs as follows:
- Spray.
- Fluff your hair with your hands.
- Spray with varnish and use a hairdryer.
- It is advisable to do styling with your head down.
In ancient times, sweetened water was used instead of varnish and spray. The curls were no worse than now. The only downside to this folk remedy is the stickiness and tangling of hairs.
Free style
Unlike the hairstyles described above, beach curls do not involve styling hair to hair. Beach waves create an image of lightness, ease, freedom, and naturalness. Ideally, beach hairstyles look as if the owner has recently swam in the sea, the hair is not yet completely dry, and has been slightly tousled by a warm breeze. You can make a straight parting and casually comb light curls to one side.
Beach waves are an informal hairstyle, ideal for an everyday look.
Beach waves are a hairstyle that features light, loose curls. Long or short strands don't matter. To perform it, you will need an iron or a hair dryer, a means for fiction. The head should not be too clean; it is better to do your hair on the second day after washing your hair.
Waves with braids
Braiding tight braids is one of the most gentle ways to create a light wave.
- Apply mousse to damp hair and comb thoroughly.
- We braid them into one or several braids. The thicker the braid, the larger the curl.
- We unravel them in the morning - the strands will lie in beautiful waves.
If you wish, you can put the braid in a bun - the wave will be even better.
For a quick effect, you can use an iron:
Which waves last longer?
The most durable styling is in the form of light waves on medium hair, obtained by braiding. It seems paradoxical, but braids are the easiest way to create waves, and at the same time the most reliable.
Wet hair braided takes on the desired shape, and when it dries, the hairstyle is naturally held in place, which is much superior to styling created using thermal devices.
Lateral
This retro hairstyle has found a second life: it is often used to complement a shaved temple for a special occasion. You need to wash your hair and dry your hair with a hairdryer without using combs or styling products. Then, using a wide diameter curling iron, you need to add a light wave. After finishing the work, the curls need to be thrown to one side, secured with hairpins and styling agent.
Basic methods of laying waves
The challenge is how to make beautiful, flowing waves on straight hair on your own, without resorting to the services of stylists, so that the hairstyle looks professional and like it came from a visit to the salon.
Basically, waves are made using an iron, hair dryer, curlers, curling irons and other improvised means available in the home arsenal of a modern woman. In this case, devices such as wet wipes, tourniquets, and bandages are often used, which are not found in the stylist’s kit.
Curls made from wet wipes
This is a modernized version of the rags that our great-grandmothers used to spin.
1. Stretch a damp cloth (preferably odorless) into a flagellum.
2. Comb wet hair and divide it into separate strands.
3. Wrap the strand in a ring around the center of the napkin. We tie the ends with a knot.
4. Let your hair dry, unwind the napkins and separate the strands with your hands.
Advice from experienced professionals
After making sure that her choice is correct, the girl should choose the right curls for her hairstyle. They should look like silky and shiny light waves that will hide minor facial imperfections and emphasize your strengths as much as possible. The following tips from stylists will help her with this:
- For owners of an elongated oval, large, voluminous curls are suitable;
- girls with a face in the form of a rectangle or square should prefer horizontal large letters;
- For chubby beauties, uneven styling is suitable, which consists of large root curls and small curls at the ends of the hair;
- girls who are lucky enough to have an oval-shaped face can experiment with any variety of large curls.
Curls for beautiful curls
Don't know how to make wavy hair at home? Twist them into bundles!
Step 1. Comb wet hair.
Step 2. Divide them into 3-4 parts (depending on thickness).
Step 3. We twist each part into a bundle, then put them in a bun and secure with hairpins. Do not make the bundles too thick - your hair will take a long time to dry.
Preparing to create curls
- Wash your hair with your favorite shampoo as usual. It is not recommended to style hair on dirty strands - it will quickly lose its original beauty and the curls will fall off under the weight of sebum and accumulated impurities;
- An optional step is applying a mask . It will nourish the rods, make them softer and more moisturized, which will also affect the appearance of the curls. It is recommended to use the mask 1-2 times a week depending on your hair type. If you don’t need a mask now, after shampoo, go to conditioner;
- Apply balm or conditioner . The product will cover the scales of the hair shaft, make combing easier, moisturize and protect the strands;
- Dry your strands with a towel . It is better to use a microfiber towel - it removes only excess moisture, leaving the rods nourished and moisturized. The degree of drying depends on your intentions. If you plan to use the overnight method of creating curls, then it is recommended to dry your curls by 50-70%. If you leave them too wet, you risk getting strands that are not dry in the morning or too pronounced curls. For express methods that help curl hair quickly, it should be 70-80% dry;
- Apply styling product . It can be a gel, foam, spray, cream with fixing or texturizing functions. You need to choose a styling product based on your hair type - for dry hair, products containing alcohol are not suitable; for oily hair, products containing oils and a greasy base are not suitable.
2 “NOT” when creating curls:
- Do not twist curls onto strands that are too wet - the roots will be pulled too hard;
- Do not comb your curls, otherwise you will get a “dandelion” effect. It’s better to separate them with your fingers, carefully separating the strands.
The essence of all methods of creating curls without a curling iron is to forcefully give wet hair a direction that it “remembers” during the drying process, and thanks to styling products, it retains it for 1-2 days.
In practice, curls are made without fixing gels, mousses and sprays, but in this case, take into account that the shelf life of the curls will be shorter. It depends on the type of hair - hard and heavy hair will “fall off” faster, perhaps even after a couple of hours. The same thing will happen with porous hair shafts. The styling will last a little longer on normal-type, medium-density curls.
Styling tips
Sometimes, to get a natural curl, you just need to cut your hair. Some people have no idea that they have the wavy hair gene. They simply straighten up under their own weight.
We recommend you look here
- How to make a bump - ways to create a unique hairstyle and basic hair design ideas (105 photos)
How to make a beautiful hairstyle: instructions and advice from experts on how to quickly and easily create a hairstyle for every day (115 photos + video)
How to make a bob: simple and easy ways to create a popular hairstyle yourself (125 photos)
To make the wave look beautiful when styled, you need to know 3 secrets:
A good fixative does not stick or weigh down hair. And choosing the wrong one can ruin your hairstyle.
After manipulation, hot hair needs to cool down. Otherwise, the waves will not turn out as intended.If your hair is naturally unruly and conventional styling products do not help, then you can apply mousse to your damp head and dry it with a hairdryer. After that, start creating your hairstyle.
How to maintain results
Curls usually don't last long. This may be due to the type of hair, its unruly structure, incorrectly applied curling method and insufficient amount of auxiliary products to fix the style. In order for the result to please the owner of the styling for a long time, you need to follow the recommendations:
- Use a special hair styling product. This will make the curls more manageable. Curls will not only curl faster, but will also maintain their volume longer.
- Try to avoid wet areas, exposure to rain and strong winds. Unfortunately, climatic conditions directly affect the condition of curls. High humidity and wind contribute to accelerated straightening of waves.
- High-quality tools and facilities. The more expensive the curling iron, for example, the better the hairstyle will be not only aesthetically, but it will also last many times longer. The same applies to hair fixing products. Cheap mousses do not do their job as well.
- Use plenty of hairspray. Of course, it will help keep the curls for a long time, but it will spoil the appearance of the hairstyle, as it will make the hair “stony”.
- Do not comb your hair after creating curls, otherwise the time spent will be useless. Curls will immediately turn into straight hair. To give them volume, use your hands moistened with cosmetics.
- If your hair is unruly, use hairsprays with a strong hold, it is better if the product is professional. It is more expensive than regular varnishes, but it will give better results and it costs less.
- Contact a beauty salon. Professionals will quickly create the necessary styling based on your hair type and will do everything possible to ensure that the curls last a long time. You can also use a perm procedure, where the waves will last even after washing your hair for several weeks. But this option will not allow you to straighten your hair, and an unprofessional hairdresser can burn your hair from the roots to the very ends.
There are a lot of ways to create beautiful waves - they differ in time and financial costs. To choose the right one, you need to take into account not only the length of the hair, but also its structure and obedience. If your hair is thin and brittle, then it is better to use traditional methods for acquiring curls so as not to subject them to even more stress. Thick and healthy hair can be treated with preliminary protection using heat tools.
Curls using a flat iron and foil
Metal foil enhances and prolongs the impact of the iron. The curls turn out very beautiful and last much longer.
- Foil mode into small rectangles.
- We comb our hair and divide it into equal strands (about 10) - on top, sides and bottom.
- Lightly twist each strand, wrap it in a ring and wrap it in a rectangle of foil - bend it in half, put a hair ring on one half, and cover it with the other half. We bend the edges of the foil so that the “pocket” holds on.
- Heat each ring with an iron for 2 minutes.
- Let the foil cool completely and leave it for a few more minutes.
- Remove the “pockets” from the strands and straighten the curls with your hands.
Curls are adorable
In most cases, women prefer to wear curly hairstyles. Some have this gift by nature, others strive to achieve this effect with the help of all kinds of means and devices. The desire for girls to wear curls was not in vain. According to statistics (according to a survey), representatives of the stronger sex prefer just such a hairstyle on their companion. The girl seems more tender, touching and a little helpless. And guys love to take care of their loved ones and protect them from all earthly troubles. This gives them self-confidence and a sense of satisfaction with their status.
Retro waves
This styling was very popular in the 20s of the 19th century. Today's fashionistas also love it.
- Divide carefully combed hair with a side parting. Select a triangle of hair from the back.
- Divide the part with more hair horizontally into 5 sections. On the smaller side you need to make at least 3 sections.
- Lubricate the upper section heavily with gel and comb it with a comb.
- We lay the strands in waves, fixing each bend with a special clip.
- We style all the hair according to this pattern.
- We also lubricate the back strands with gel and curl them with curlers.
- Let the gel dry and carefully remove the clips and curlers.
Choosing a styling product
Now you know how to create light waves on your hair, but that's not all! The style will only hold if you apply a good styling product to your hair. Let's look at them in more detail:
- Mousse – suitable for hair of any type and structure. It can be applied to both dry and damp hair. The more mousse you use, the longer your hairstyle will last. But it is important not to overdo it, otherwise your hair will become dull and unkempt. A volume equal to the size of a tennis ball is sufficient.
- Aerosol gels are a modern product that should be applied only to dry strands. The advantage of this gel is good fixation, creation of volume and easy combing.
- Foam - fixes the strands and gives them volume. An excellent choice for those with thin hair. The foam is usually applied to damp hair and distributed with a comb along the entire length of the hair.
- Varnish – fixes the finished waves. The varnish is applied from a distance of 30 cm, otherwise it will stick the strands together.
Alternative methods
When you don’t want to bother with special devices, ancient but still effective methods for creating light curls come to the rescue.
Braids
We can say that this is the most gentle styling possible. But braids will not harm the hair and hair follicles only if they are not tight! It is enough to apply a small amount of light cream to slightly damp hair to shape the hair, braid light braids without pulling too tightly in the root zone. After 5-7 hours we unravel and enjoy the natural waves. To achieve a faster result, it is permissible to braid the braids and work them with a straightening iron for 10-15 seconds. .
Nadezhda Yusufkhanova
Technologist Redken
Harnesses
Dry your hair 80% with a hairdryer, then apply cream/mousse/sea salt to form curls, twist the strands into light strands and dry with a hairdryer with hot air. Let the strands cool, unravel, fix with varnish and get a natural styling. By the way, Victoria's Secret angel Candice Swanepoel does exactly this in everyday life!
Nadezhda Yusufkhanova
Technologist Redken
And of course we will not leave you without an object lesson! Look at the stylish look you can achieve just with the help of salt spray and the tourniquet technique. L'Oréal Professionnel 's Beach Waves Texturizing Salt Mineral Spray , which is highly rated by our experts.
View this post on Instagram
Posted by SHEMANAY© (@shemanaevamarina)
Papillots
Previously, this was the name for strips of fabric or paper on which strands were wound. Now curlers are bendable foam curlers . Due to their small diameter, it is difficult to achieve the effect of natural wavy hair with them, but it is possible: just use styling products with a light degree of fixation, and the curls will straighten a little under their own weight.
Headband
A very simple way: put a solid braid of medium width on your head and pass the strands treated with styling agent through the bandage as many times as the length of your hair allows.
Absolutely any texturizing spray will be useful here, but the method with a bandage does not guarantee root volume. As the last step, you can apply a little powder along the partings and beat your hair with your hands, lifting the strands from the roots, then the hairstyle will not seem flattened on top.
Saline spray
View this post on Instagram
Posted by L'Oréal Professionnel Paris (@lorealpro)
View this post on Instagram
Posted by L'Oréal Professionnel Paris (@lorealpro)
Suitable for those whose strands tend to curl, but always in some inappropriate way. It is enough to apply the spray to damp hair, “walk” through the curls with your hands using squeezing movements - and the waves in the “surfer girl” style are ready!
The best salt sprays according to SalonSecret. Texturizing L'Oréal Professionnel Beach Waves Redken Fashion Waves wet hair spray and luxurious two-phase oil spray Kérastase Soleil are three of our experts' favorites.
Glamor: how to make medium-length wavy hair with a headband
Charlize Theron
Blake Lively
Simple Alice
or tiaras decorated with rhinestones, headbands will emphasize a neat hairstyle or collect unruly curls from the face, remaining a wonderful decoration for both the evening and the office. It is best to wear headbands with careless, voluminous and elastic waves, complemented by the use of some kind of texturizing product. And here, the “correct” girlish style is the last thing we need.
- Before curling, treat your hair with a heat protectant (it doesn’t matter whether it’s freshly washed or yesterday, the main thing is that the hair should be dry).
- Curl your hair with a medium-sized curling iron, twisting the strands in different directions, clockwise and counterclockwise. Grab the strands along with the ends, holding for a few seconds. Make sure the hair is warm by touching the strand with your fingers and open the curling iron to release the curl.
- Let your hair cool, then straighten your hair with your fingers or a soft brush.
- Add light texture and volume by massaging your hair at the roots with your hands, tousling and breaking up strands.
- Hair styling should look slightly careless, but the parting is one way or another, and the headband is the only thing that will give your hair shape without making you look like an elementary school student.
Creating a Hollywood wave without secrets
Hollywood waves are the easiest way to create a great hairstyle. This hairstyle is recommended for girls with hair of the same length. On hair with a ladder cut, the ends will stick out in different directions and the desired effect will not be achieved. To create Hollywood waves you will need: mousse for styling curls, a comb and a curling iron with a diameter of 25 mm.
Tip: If your hair doesn’t hold its style well, you should first dry it by treating the curls with mousse.
- Place your hair in a side parting.
- Separate the hair from the parting to the opposite ear. This will be the “work” area. She is screwed first. Temporarily secure the back hair and strands from the “non-working” side zone with a hairpin so that they do not get in the way.
- You need to start curling your curls from the bottom, separating the strands in rows strictly parallel to the parting. The first strand is taken directly behind the ear. For convenience, lift the rest of the hair and secure it at the top.
- Take the curling iron parallel to the parting, place it under the curl and twist it around the curling iron in tight turns (while slightly twisting the strand around its axis with each turn). Continue to hold the tip of the strand and pull it a little. After 5-7 minutes, release the ends of the hair and allow the curl to slide off the curling iron itself. It is better to grab the curl with your palm and gently lower it.
- All curled curls should not be touched until they have cooled down. The quality and appearance of the wave depends on this.
- Moving from bottom to top, we wind the remaining strands from the “working area”.
- Then the hair from the “non-working area” is curled. In this case, the curling iron is placed not under the strand, but above it. Here the hair is curled in one large strand.
- We process the curls from the back of the head last. We separate the strands from below, parallel to the floor.
- Allow your hair to cool completely, then comb each strand at the roots and spray with hairspray. At the end, use a very wide-toothed comb to form waves.
- For greater effect, fix the broken strands from the “working area” with flat hair clips, slightly pulling the hair up with a comb and at the same time holding it by the ends with the other hand.
- Pin the “non-working” area with bobby pins matching the hair color and also fix it.
- After 5 minutes, remove the clips and spray your hair with hairspray. Use a comb to smooth out any stray hairs so that the style resembles a single, smooth wave.
A video with step-by-step explanations will help you create a Hollywood wave on your hair.
The important difference between a medium-length wave and a short one is that we do not curl the lower, shorter curls, but use hairspray to hide them behind the ear or smooth them.
Video instructions on how to make waves on short and medium length hair, with step-by-step explanations: